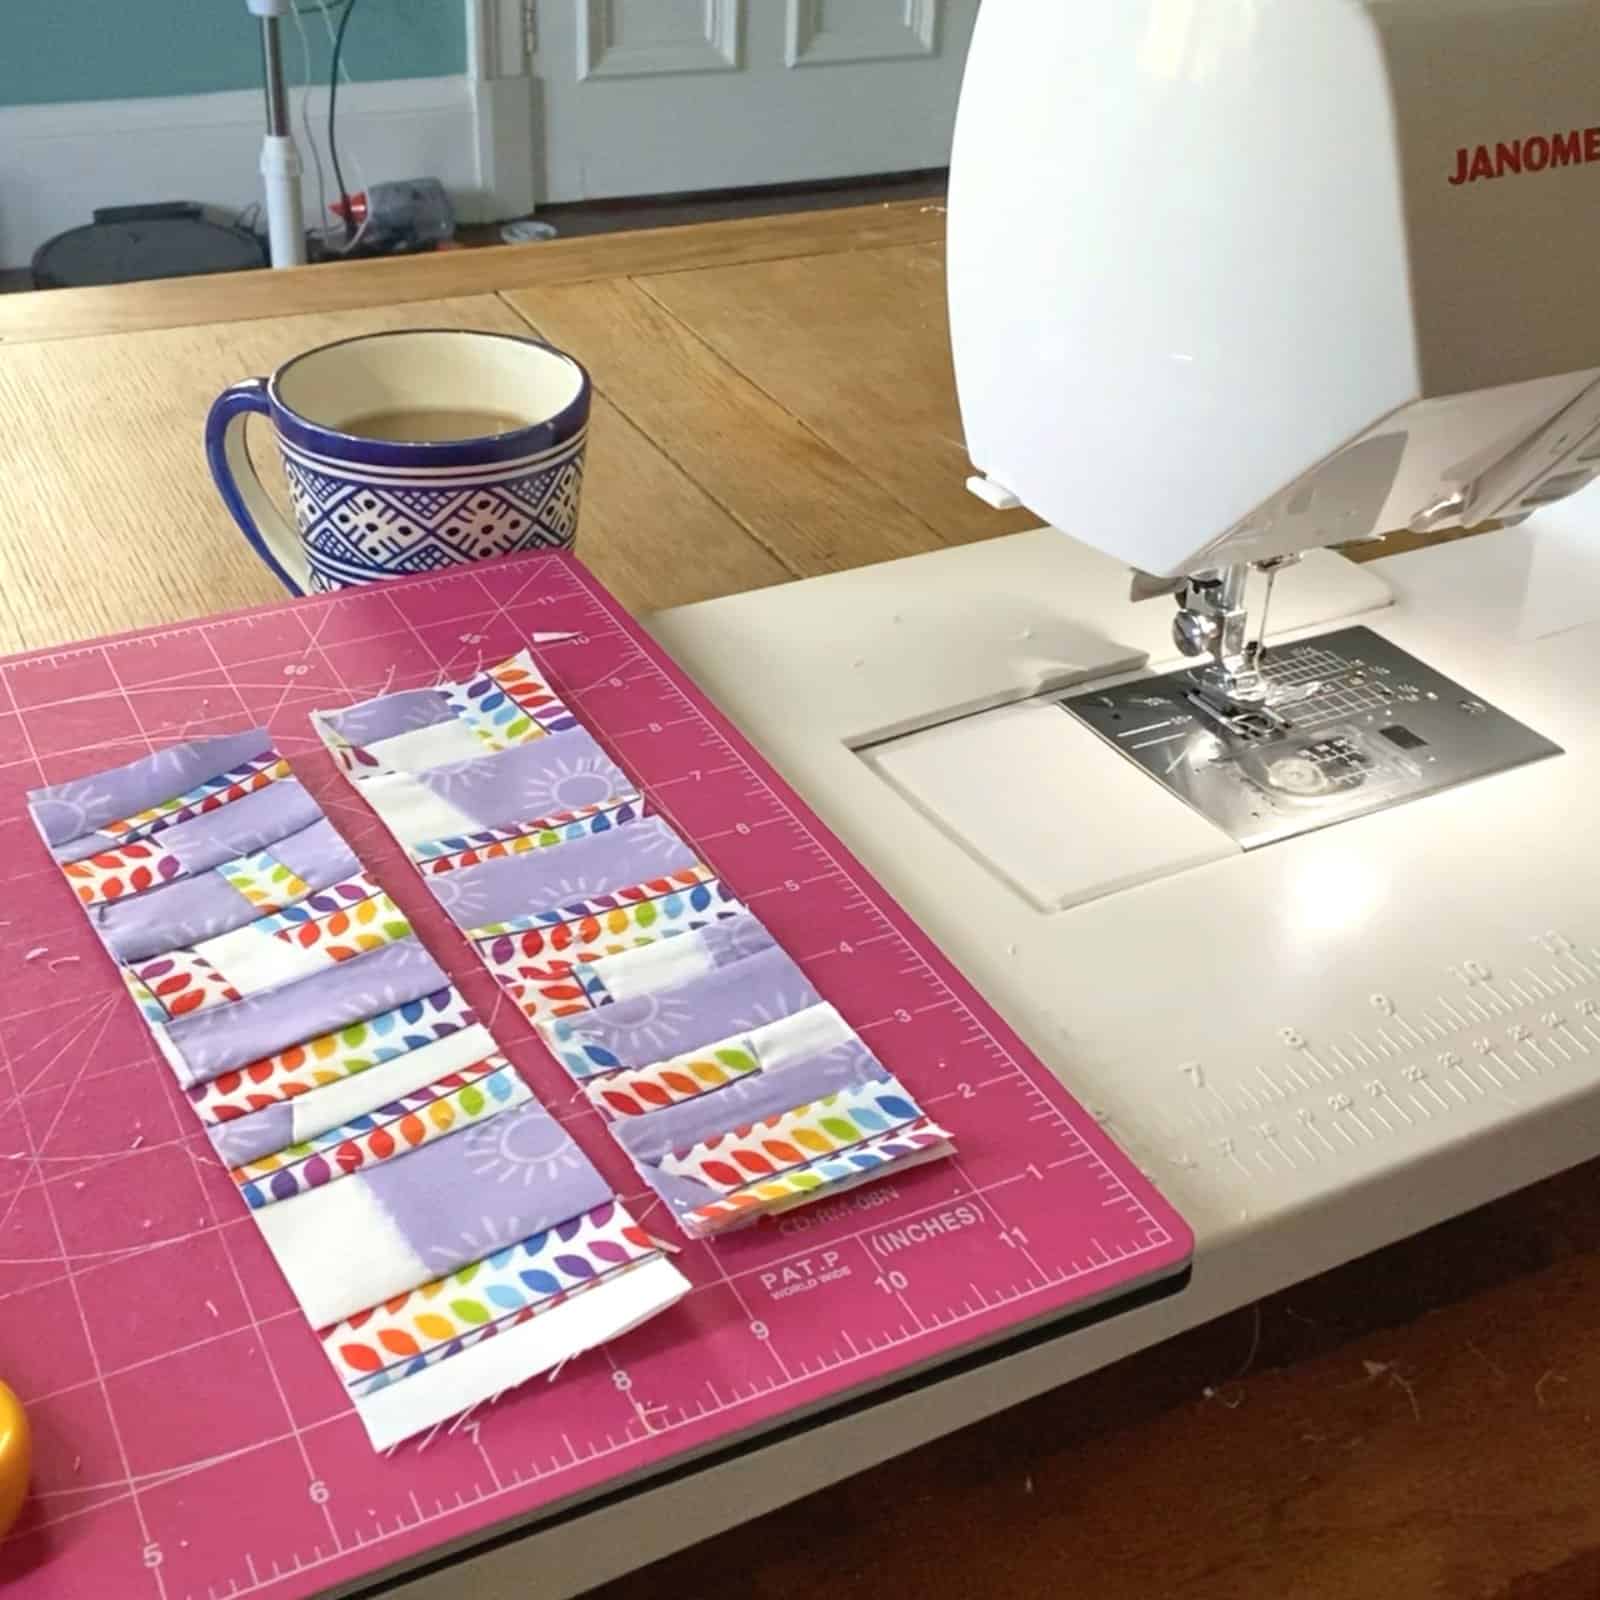
Learning to Quilt: ‘Learner’s Quilt’ Sampler Part 2
I finished my Learner’s Quilt! Hurray! If you missed Part 1 of my learning to quilt journey you can find it here.

This is my second ever quilt. I’ve been calling it my ‘learner’s quilt’. It is essentially a sampler quilt but as I’ve been learning to quilt I’ve just been finding tutorials or patterns for different blocks or techniques and trying them out as I go.

The intention was always to put these learning blocks all together into a quilt once I ran out of the leftover fabric I was using.
I didn’t plan the layout ahead of time so for me it is a hodge podge of a ‘learner’s quilt’ rather than a planned out sampler!
This post contains affiliate links – please see my disclosure policy for more details.
New Quilt Blocks
I made lots of new blocks since I lasted posted about this as well as a number of free motion quilting practice panels.
I’ll go through the new blocks and where I got the free patterns and/or the inspiration for them.
The big headache with this learning exercise was the assembly of course. Because this was a learner’s quilt with no plan for a finished size so none of the blocks were a standard size.
It was a bit like putting together a jigsaw puzzle to get it into a semi-rectangular shape, but a jigsaw that no ever actually designed to fit together!
I also started with one quilt as you go method and then switched to another because I didn’t like how it was looking – more about that below.
The Blocks
If you missed Part 1 of my Learner’s Quilt journey you can find it here – if you are interested in any of the blocks and they aren’t detailed in this post that is where they will be!
Churn Dash Block

I choose to do a Churn Dash Block because it is such a traditional feeling block but I of course gravitated towards this scrappy version using 1″ strips from Patchwork Facil. The tutorial I followed to make this block is here.

I like how the block turned out by my quilting choices in the outer beige rectangles was unfortunate!
One of the things I am learning through this exercise is that I need to sit for a minute and think about what I’m doing instead of just starting to stitch with no real plan…which is pretty much how I normally roll!
Flying Geese attempt #2
My first attempt at flying geese, which I described in Part 1 of My Learner’s Quilt blog, did not go well.

So before I tried another method for geese in a row I decided to try a paper pieced Circle of Geese pattern by Piece by Numbers. It is one of her many free foundation paper piecing patterns.
I think it turned out pretty well. It was my first paper pieced pattern that was made up of more than one section and I was pretty pleased with the outcome.
I did mess up one section though where I had tried using the freezer paper method instead of the regular foundation paper piecing method.
I guess doing it with freezer paper reverses it?

In any case I ended up with one panel that was going in the wrong direction when I tried to assemble the block, so I had to make another one.
I put the strange facing-the-wrong-direction block lower down in the quilt so as not to waste it!
Flying Geese attempt #3

So on the back of my successful Circle of Geese attempt, I decided to try another paper pieced flying geese block for some geese in a row. I used another of Piece by Number’s awesome free patterns – this one was designed for a border although I obviously didn’t use it in a border.
My conclusion on the flying geese methods I think for me is that paper piecing is much easier for me to do it precisely – although notice I still lost some points here!
I presume one gets better with practice at this sort of thing though so I might keep trying!
Economy Block

So these next two blocks I think have fairly similar results but very different techniques.
This first one is an Economy Block and it was paper pieced using freezer paper. I didn’t do it perfectly but it still came out fairly well.
The paper piecing template was free and I got it from Karen Brown’s website – Just Get it Done Quilts. I also watched her youtube video that explained how to do it. You can see the video and download the pattern from her website.
Exploding Block
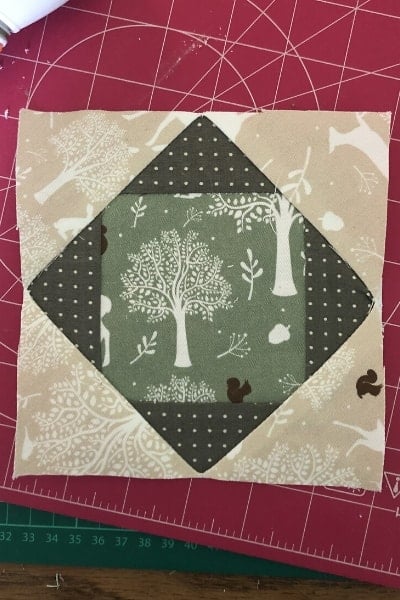
So after I’d done the Economy Block I happened upon a tutorial on Exploding Blocks by Jenny Doan of the Missouri Star Quilt Co.
To my mind these blocks are very similar – albeit with the Exploding blocks you don’t have the sharp edges and points of the Economy Block.
The Exploding Blocks method is so much easier though…so weighing it all up I have to say I probably prefer the Exploding Blocks method.
What about you?
Half Square Triangles & Pinweel
I have of course heard people moaning about Half Square Triangles but before I attempted them I honestly thought, how hard can it be?
I understand now what all the moaning was about!
I first tried a tube strip method that I won’t bother linking to because I couldn’t get it to work right – probably more me than the method, but in any case I got it all confused and ended up with some half square triangles and some where the triangle split down the middle and just made a bigger triangle – not how they were meant to turn out at all!
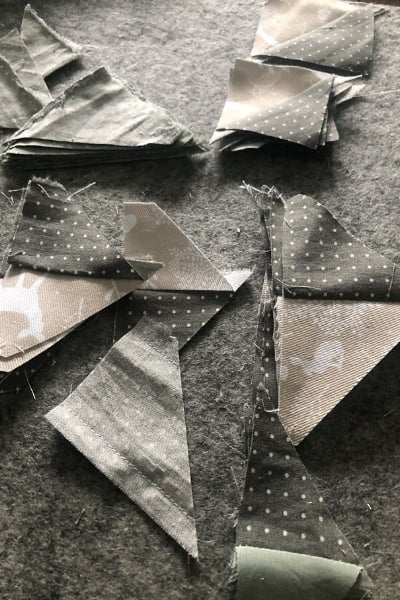
I put them together into boring and very wonky blocks and used them to fill awkward spaces in the quilt when I went to assemble it.

So for take two I used the 4 at a time method from Blossom Heart Quilts.
It wasn’t as fast as the original strip tube method but it resulted in much better results! I made this cute Pinwheel Block out of the ones made with this method.

Dresden Plate
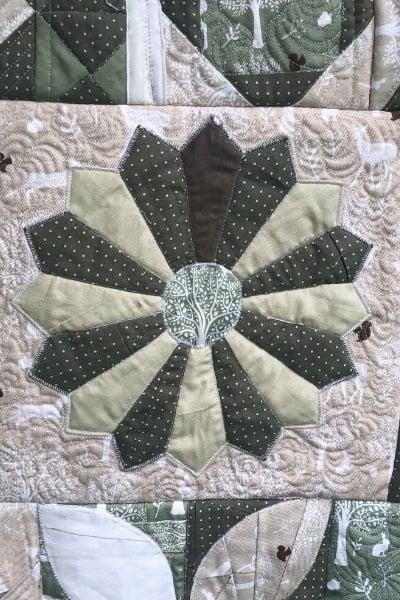
I’m actually really pleased with this Dresden Plate Block. It was a lot less fiddly to do then I feared!
I got the templates and the instructions for how to do it for free from the AQS website here.
I do wish I had had one more piece of the beige fabric though to finish it off at the top.
The one brown blade is an off cut of one of my husband’s old shirts – which is why there is a seam in the middle! I did this block near the end when I was starting to run out of larger scraps!
Orange Peel Block
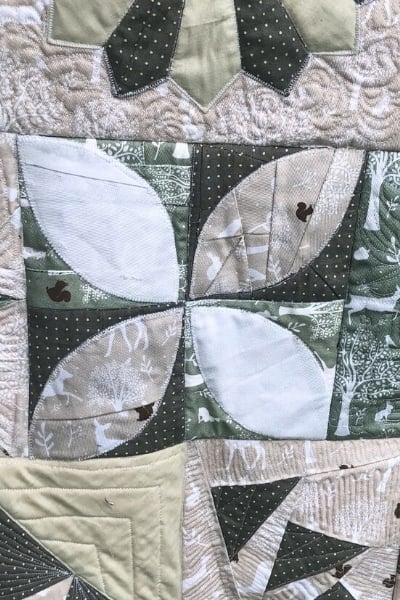
I know, I know…the centre doesn’t quite match up on this one! But I still love it.
This is one of the blocks I tried that I can actually imagine attempting a whole quilt’s worth of.
I used the free template from Sew Can She.
The strange seams on some of the peels are because as with the Dresden Plate Block above, I did this block near the end and I didn’t have larger pieces of all the fabrics I was using left, so I pieced some smaller scraps together until I had a piece big enough to cut my peels out of!
This was done applique style according to the instructions on the Sew Can She blog linked to above.
I’m not sure if you can see it in this photo but I used a zig zag stitch to secure the beige print petals and a blanket stitch on the white petals. Just because I had never used a blanket stitch before so I wanted to see the difference. I like the look of the blanket stitch but in all honesty I think they both look as good as each other!
Scrappy Triangle

I chanced upon a post by Lelia Gardunia about her Year of Scrappy Triangles. Basically in 2017 she released a new Scrappy Triangle Foundation Paper Piecing Block every week. You can download them all still for free – you just need to enter your email address in her site.
I choose one to try (Block #10) for my Learner’s Quilt and I really like it. I might try some more for a future project.
Paper Pieced Star
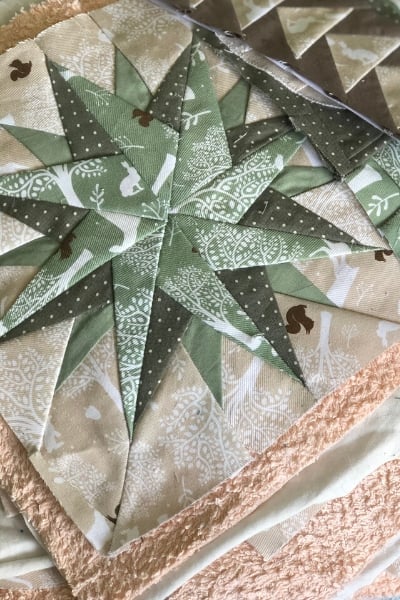
So by now you will have figured out that one of my major takeaways from my Learner’s Quilt is that Foundation Paper Piecing is fabulous!
I was scared of it before I tried it, but now I see how much easier it makes it to get a crisp and precise outcome – something I am far from achieving when I piece things the old fashioned way!

The template for this block was from Pitcher’s Boutique.
Again it was free. It’s listed as $0.01 but when you enter the code listed on the webpage at checkout it’s free. She has loads of other free and cheap patterns to scroll through while you are there!
Pineapple Block
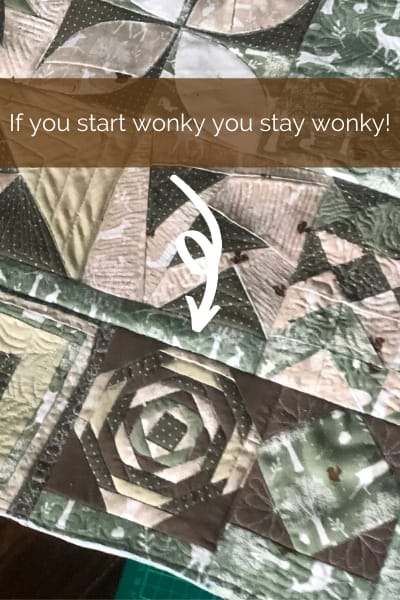
I really wanted to check off a Pineapple Block off my list of things to try. And after all the paper piecing I’d been doing it seemed like the logical way to go.
But mine turned out pretty wonky and here’s why…
I forgot to turn my stitch length down before I started so I started sewing with a 2.4 stitch lenght and I punched huge holes in my paper which meant my first seam didn’t stay attached to the paper it just fell off it.
I couldn’t be bothered to restart so I ended up trying to hold the middle in place until I had the next seam attached with the proper stitch length.
For the other paper pieced blocks I think I used 1.5 or it might even have been 1 – this is recommended so it is easier to perforate and remove the paper later on but it also means yo don’t inadvertently tear the whole paper off ahead of time – as I found out!
More Improv Blocks
I’ll go in to more about the assembly of the quilt below, but suffice it to say I needed some ‘filler blocks’ to be able to sew this mishmash of ill fitting blocks together!
Another aim of this quilt was to use up all of this woodland print fabric that I’ve had hanging around for what feels like forever. I didn’t want to have a scrap of it left!
So the answer to both issues was to use the scrappy funny shaped pieces that were left at the end of everything to make some improv blocks.
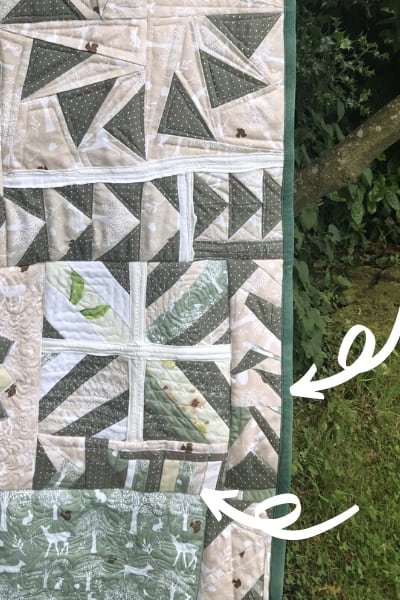
I made them different sizes, one a sort of scrappy, wonky log cabin type deal, one a super long strip that kind of ended up looking like a braid and another that started off looking like a triangle but got cut into a rectangle when I knew where I needed to fill space.

I love this kind of sewing and I will no doubt do another post about all the different ways I like to do this. I have much less anxiety about improv sewing than proper piecing!
More Free Motion Practice
The other thing I used to fill some spaces in the layout was just a largish piece of the fabric, sandwiched, that I used for free motion practice.

Even when it turned out diabolical I still cut it up and used it in odd corners to fill a space and make a rectangle (ish!) shape for my quilt.

I’ve been dipping in and out of Christina Cameli’s Book ‘Step by Step Texture Quilting’ as I’ve been learning to quilt. I really like her style on the youtube and instagram videos I’ve seen her do so I went ahead and bought the book.
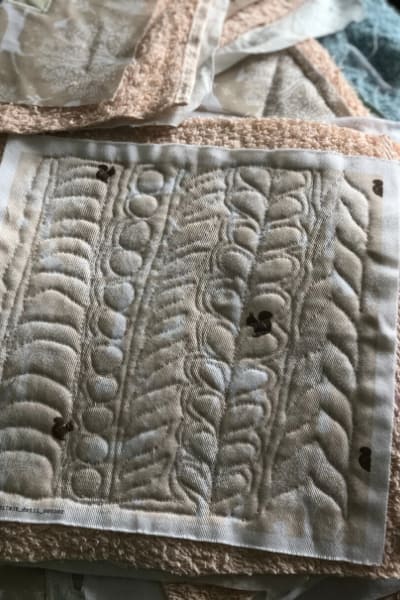
I have a lot of learning to do to get anywhere near being able to master a lot of the designs but it gives a good jumping off point and I like the directional arrows in her diagrams telling you where to head next!
Assembly
So here was me thinking Quilt-as-you-go means easy-to-assemble.
It definitely does not.
Or at least not the way I started out doing it. It did get better as I went along but I had to make a bold decision part way through to completely change my quilt as you go technique.
Layout
I did try laying out the blocks ahead of time to find a layout but often times things ended up a slightly different size when they were joined up and I had to improvise.
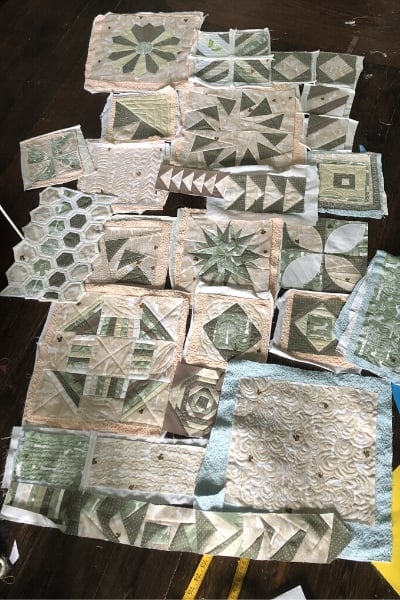
I basically planned one row at a time and sewed it together as I went – which also means the assembly method changes as you go down the quilt.

I first joined smaller blocks to make bigger sections until I had enough sections the were the same height.
Then they could be joined together in rows.
I had to cut improv blocks and free motion practice panels to make it all fit – see below for more on that.
Quilt as You Go Methods
Update: Since writing this post I have tested many more quilt as you go methods and wrote about it here – and then update again I have found an even easier (for me anyways) method for quilt-as-you-go here.
Fun & Done QAYG Assembly Method
I went over in Part 1 of my Learner’s Quilt story that I was going to do this fun & done method of quilt-as-you-go. (You can find the tutorial video I followed if you go back and read Part 1).
Essentially what it involves is cutting your backing bigger than your block and batting and sewing the backing fabric of two blocks together where the blocks meet and then using the excess background fabric to wrap around the front like binding. So each block has a sort of an inbuilt binding or mini sashing if that makes sense?
Anyway when I first saw this method I was like, ‘wow, that looks so cool and so easy I need to try that!’.
Well now I have, and in reality it was fiddly and it didn’t look very good.

Now. I was using a stupid backing fabric – stretch cotton upcycled cot sheets. I know, I know. I’ve learned my lesson (read on for more on that too).
So perhaps if I had used quilting cotton on the back of my blocks like a sensible beginner quilter I might have had better luck with this method.
As it was I had a stretchy crumpled mess where I tried to join blocks up like this. I left them, as the whole thing is meant to be a learning exercise, but once I’d done a few this way I decided it was not the way forward and I went searching for other methods.
Quilt as You Go with No Sashing Assembly Method
I did find the sashing method of quilt as you go – with a strip in the front and another in the back and lots of folding over, etc, etc. I decided that probably wouldn’t go any better for me than the fun & done method.
But this tutorial from Teresa Down Under caught my attention and I decided to try it. With one exception. I didn’t want to do the hand sewing at the back so I tried doing it by machine instead and hoping it wouldn’t be too noticeable on the other side.
You probably know where this is going. You can absolutely see the machine sewing through the front and it looked pretty odd with my already quilted blocks.
You could perhaps get away with it if you were quilting an outline around your block anyway but I hadn’t done that ahead of time!
Also again, my ridiculous choice of backing fabric meant that the folding over in the back didn’t go any better than doing it on the front.
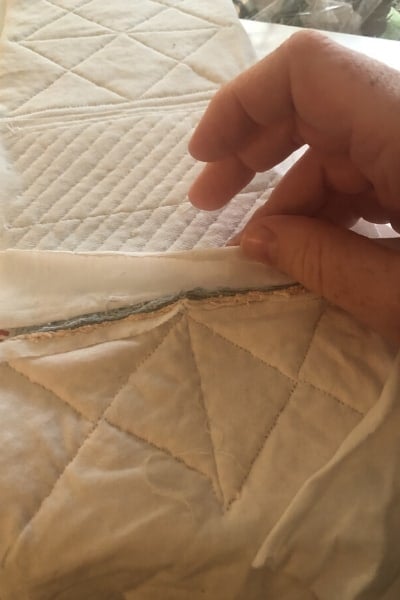
It was at this point that I realised what a poor choice the backing fabric had been. Both because it was too stretchy and because it was so see through that you could see the colour of the towels I’d used as batting through the back (yes towels!, see part 1 for the why).
It just was never going to look ‘finished’ with that as the backing. So I decided I was going to add another backing fabric on at the end.

This meant I could try one more quilt as you go method that actually calls for putting the backing on at the end.
I didn’t bother trying to remove the old backing I just ended up with a 4 layer quilt sandwich instead of 3!
Quilt as You Go – No Backing Assembly Method
This last method that I tried and the one I ended up using for most of the joining is one I saw from Wendi Gratz.
It is part of a series of QAYG videos fo hers – to be honest I didn’t watch the others just this one.
It was enough to understand that I could sew the blocks together right sides to rights sides, press the seams open and then add the backing after the fact.
So that’s what I proceeded to do.
I did do a bit of trimming away at my towel batting where I felt like the seams got too fat, but in general I was surprised how easy it was to sew so many layers together and how flat I was able to get it once the seams were pressed.
Below is a photo after one press but before the final press and putting on the backing.

Joining the Hexagon Panel
One of the parts of this quilt – one of the many parts – that I didn’t think through 100% ahead of time was how I was going to join the hexie panel to the rest of the quilt.

I used a hexagon quilt as you go template that for the hexies and I had also bought a half hexie QAYG template as I thought that was what I needed to square up the edges (see Part 1 for links for all of that).
That worked on two sides but not the other two. For them I would have needed a different shape to fit in the gap – geometry was never my strong suit so I didn’t figure this out until the whole panel was put together already.
So you can probably guess what I did in the end.
I just cut off the sides to get my straight line.
Well actually I sewed it together with the adjacent block first and then trimmed off the excess.
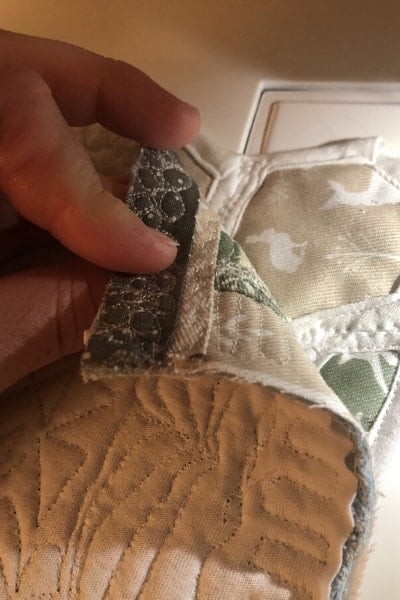

Don’t get me wrong that is definitely the bulkiest seam of the whole quilt, but even with that I think it looks okay to be honest.
I think with this hexagon quilt as you go method you aren’t meant to square it up at the end. You are meant to have a hexagon shaped edge to your quilt, so doing it as part of a larger sampler type thing was never the intention!
New Backing Fabric
I found a piece of backing fabric from my ridculous stash of other people’s remnants that I compulsively buy (generally I buy these for upholstery and bag making projects).
It was pretty much exactly the size I needed (a little bigger but pretty close).
It is a linen blend fabric so probably also not anybody’s first choice for a quilt backing but the colours seemed to look right and it was way better than the cot sheets so I went with it.

I also added a label because I’ve been listening to this quilting podcast called ‘Just Wanna Quilt’ and they had an episode about how we should all be labelling our quilts.
I (of course!) didn’t plan this in advance either so it is very poorly hand sewn on instead of machine stitched to the backing ahead of time (I will do that next time!).

To attach the backing I stitched ‘in the ditch’ (sort of…close as I could get!) around all of the blocks.

Binding

I used the same machine binding method from Melanie Ham that I used for my First Ever Quilt. I find her video easy to follow and I’m pretty happy with how it turned out. I would definitely recommend this method to anyone learning to quilt who doesn’t fancy sewing their binding by hand.
Phew! Learner’s Quilt Finished!
I have to be honest. I’m glad that one’s over. I made a meal of it.
The final quilt measures 34″ by 48″. I’m calling it a small lap quilt because I don’t want to call it a baby quilt:)! In any case it’s bigger than my first quilt!


I have another scrap quilt planned for my next one and then maybe I’ll try some more pieced blocks for the one after that! I might even follow an actual pattern!
I hope you enjoyed my ridiculous learner’s quilt story and maybe found some links to some fun block patterns and techniques along the way!
If you want to hear more about my learning to quilt journey just subscribe for updates and I’ll drop all my latest posts in your inbox!
Also if you want to come back to this post later, don’t forget to Pin it!

More posts you might like:
- 7 Quilt as You Go Methods (No Hand-sewing!)
- The Easiest Quilt-as-You-Go Method Ever!
- How to Make a Modern Scrap Quilt – Improv Style!
- How to Make a Quilt-As-You-Go Denim Quilt (also uses quilting scraps!)
- X Marks the Scrap | Free Quilt Pattern for Scraps!
- My First Quilt – Improv Quilt
- Free Patterns from Scrap Fabric Love


