My First Quilt – Improv Quilt

I thought my first quilt would be my ‘Learner’s Quilt’ (which I am still working on FYI).
But I am an impatient so and so and I needed some instant gratifcation so I started on a second scrappy improv quilt using the strips from my Moda Scrap Bag.
A version of this post also appears on ours sister site Upcycle My Stuff.

Not surprisingly the improve scrap fabric quilt has come together much quicker and pipped my learner’s quilt to the post as ‘My First Quilt’.
To be fair my Learner’s Quilt is all about learning more traditional quilting blocks as well as quilt as you go techniques so it’s not surprising its taking me a bit longer. I’m also not in love with the fabric from that one so I’m less motivated to see it all put together!

I loved the fabric from my Moda Scrap Bag however, even though it was a total surprise ‘lucky dip’ sort of a purchase.
I didn’t even use the whole bag either as you can see from the photos – I didn’t use the blues or the bee prints so I can use them for something else.
Quilt Top
This post contains affiliate links – please see my disclosure policy for more details.
I decided to try to make a baby size quilt and I wanted the front to be what I think might be called a half log cabin – but one big large one.
Anyway I couldn’t figure out exactly what that look was called which meant I also couldn’t find a tutorial so I made a number of rookie errors with it straight off the bat.

First of all I started at the top with the long strips instead of down in the bottom corner with the smallest piece! Whoops!
I also tried to partially quilt as you go by sewing the strips directly onto the large bath sheet towel I was using as batting (more on that later!).

I think that would have been fine if I was doing strips straight across but because I was trying to do this stepped sort of look I really needed to piece the strips and then add it to the batting and the back I think.
Lesson learned for next time.
In any case I figured out I was probably sewing the strips in a less than logical way pretty early but rather than pick the stitches out and start again I just found a work around.
My work around was to sew each strip up to the next one leaving a 2″ gap unsewn and a with a little tail on my strip. Then I folded over the end of the tail to hide the raw edge and top stitched it down over the strip previous.

So this kind of gave me the look I was going for but with less tidy edges than I had originally envisaged.
Using my cheat’s technique the front came together pretty quick. I then needed to think about what to use for the backing.
The Backing – After Quilt Style
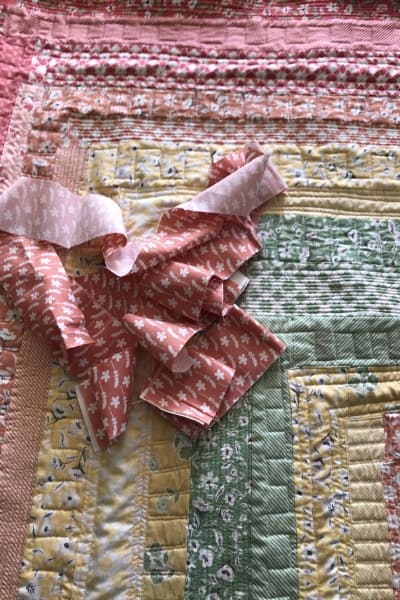
Because I’m all about using up scraps I really gravitated towards an idea from Karen Brown at Just Get it Done Quilts about making an ‘after quilt’ as the backing. So essentially you use some of the left over scraps from the front to make the backing.

So I cut up (another!) old cot sheet (the other’s are going in the Learner’s quilt but the one I used for this one was thankfully 100% cotton so that made it much easier to use).
I then made some scrappy improv blocks using the white cot sheet material as the main fabric and adding in bits of the strips that had been cut off to make my quilt top.
In the end I probably like the back of the quilt better than the front! Maybe because it actually took me longer to do or maybe because it has so much white space. I’m discovering the more I get sucked into pinterest looking at quilts that I like white space.

In any case the back also gave me a chance to try sashing around the blocks to make them fit.
I’m sure there are lots of mistakes on the back about blocks not being exactly the right sizes and also the sashing is a bit improv in itself. It didn’t go between all the rows as that would have made it too long – so forward planning in terms of the math on the back is the real downfall I suppose but I still love how it turned out.
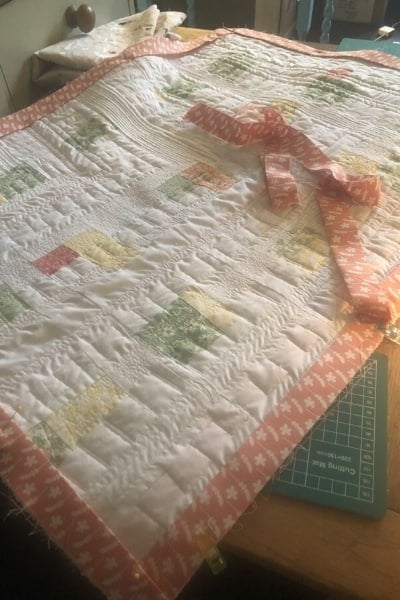
The only real mistake I made on the back – or more accurately with my choice of batting – was not considering that the peach stripes on the towel would show through the white backing in certain lights…hmmm.
Note to self, if you are going to use non-white batting you probably should use non-white fabric too!


Machine Quilting
One of the reasons I wanted to try this second quilt when I was already in the throws of my Learner’s Quilt was also to test out just how hard it really was to quilt a whole quilt top (albeit baby size!) on my machine.
It is the thought of wrestling quilts through the arm of my machine that has attracted me to the QAYG methods out there that I am trying in my Learner’s Quilt.
Turns out it was difficult – even with a small quilt like this one.
The final quilt is 25″ x 33″ – sort of…the bottom width might be a bit closer to 24″ due to some reluctance on my part to cut off a section at the bottom during my squaring up process! Bit smaller than even a standard size baby quilt – is a baby lap quilt a thing?
Part of the problem with the quilting of course was that, like everything else in my life, I couldn’t settle on one easy quilting design I wanted to vary it between the strips on the front.
The result of this was lots of having to pivot and rotate the quilt – not my best idea.
I like the look I ended up with but I would probably try something simpler if I was going to quilt a whole quilt at once like this.
I ended up alternating from strip to strip between 4 quilting designs. I didn’t accomplish any of them 100% accurately but I did quite like the look of a couple of them.

One was just lots of straight lines – I really like this one and I also like how it looks on the back. I think if it was all over the quilt it would be a bit much though so I think maybe this is one I could try on individual QAYG blocks in future.

The next one was a kind of a cog or a zipper kind of a look (see photo). Again I like this one but the amount of turning it required was a bit much for this project probably.

The easiest one was one where I just did two borders or long rectangles along the edge of each strip. It’s a less dense quilting effect which would probably make the overall quilt feel softer if I did it all over. I wasn’t in love with this technique except for how easy it was but I did like it for contrast with the others.

Lastly I did another design with two straight(ish) lines going across the strips horizontally then up along the edge of the strip for 7 or 8 stitches and then back to two lines. So again less dense but ridiculous for the amount of times I had to turn the quilt and push it through the arm. I still like how it looks but I wouldn’t recommend it if you aren’t doing a smaller QAYG block.
Binding
One of the things I was nervous about for my first quilt was putting on the binding. I had in my head that it was going to be really difficult for some reason – it wasn’t.
I followed a machine binding tutorial from Melanie Ham’s YouTube Channel and it was super easy to do.
P.S. I knew right off the bat I wasn’t interesting in hand sewing it so I didn’t even go there!

She had some great tips like zig zag stitching the edge of the quilt sandwich before you even start attaching the binding.
I used some leftover jelly roll strips I had that weren’t from the scrap bag but I thought they coordinated pretty well.
I actually loved this step because a) it wasn’t as hard as I thought it would be; and b) I could see it all being finished off as I sewed!


On to the next quilt!

So that’s it – My First Quilt! I love it – especially running my hands over the texture of the quilting.
I’m properly addicted already. I’ve already pulled out some more scraps and a few fat quarters and started a larger scrappy improv quilt.
Which will win the race to be my 2nd Quilt – improv quilt number 2 or my Learner’s Quilt?
If you liked this post and you want to come back to it later, don’t forget to Pin it!

You might like these posts too!
- 7 Quilt as You Go Methods (No Hand-sewing!)
- How to use Fleece for Quilt Backing
- Quick Denim Quilt (Improv Quilt with Instructions)
- Scrappy Disappearing 9 Patch Quilt
- Scrappy Improv Quilt Squares
- A Scrappy Quilt with Scrappy Binding (& even Scrappy Quilting!)!