7 Ideas for Using your Orphan Blocks!
In this post I am going to be sharing fun and easy ideas for using up your leftover quilt blocks – otherwise known a Orphan Blocks!
I’ll go from simple to slightly more complex – I hope you find an idea that is perfect for your orphan quilt blocks!
This summer, I took a more relaxed approach to my sewing and dove into something I’ve been calling my orphan block summer. With the kids home and life a bit slower, I gave myself permission to just play in my sewing room — and rediscovered a whole box of forgotten blocks that sparked a creative flurry.
NOTE: There is a video version of this post if you prefer- see the Table of Contents for the link.
Table of Contents
- What Are Orphan Blocks?
- Fast Projects from Single Blocks
- Easy Quilt Tops from a Grouping of Blocks or a Leftover Section
- Slotting Blocks into a Grid
- Scrappy Charm Pack Quilt
- Embracing Negative Space
- Pure Improv: Set yourself some boundaries & play away!
- Quilt-As-You-Go Rows
- Video Version of this Post
- Final Thoughts: Let Your Blocks Lead
What Are Orphan Blocks?
An Orphan block is a funny term used by many quilters. Orphan blocks are quilt blocks that never made it into a finished quilt basically.
Maybe you made one as a test block, played with a technique, or started a series and didn’t finish.
My orphan blocks are a mix of styles, sizes, and colors — a true mishmash.
If you’ve got a similar stash gathering dust, this post is full of quick ways to turn them into something delightful.
Fast Projects from Single Blocks
The quickest wins came from using solo orphan blocks in smaller projects:
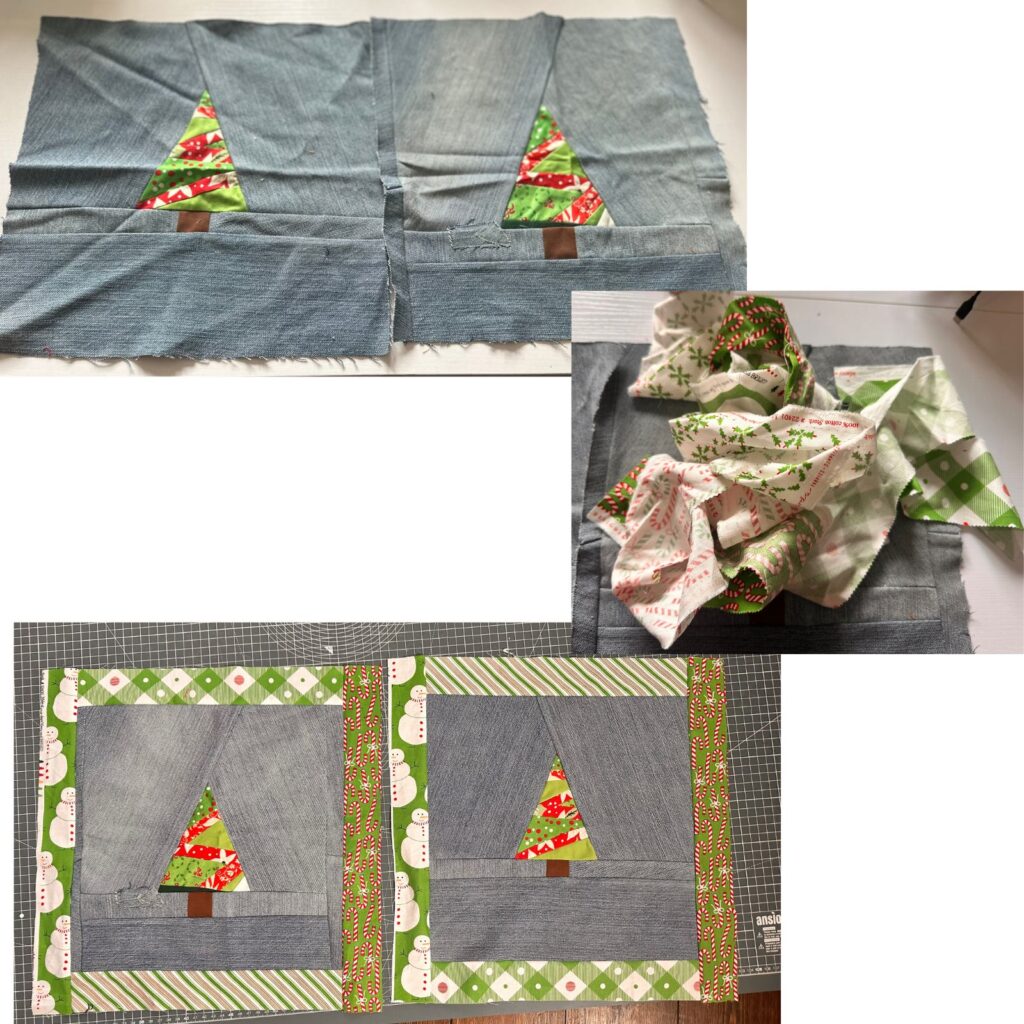
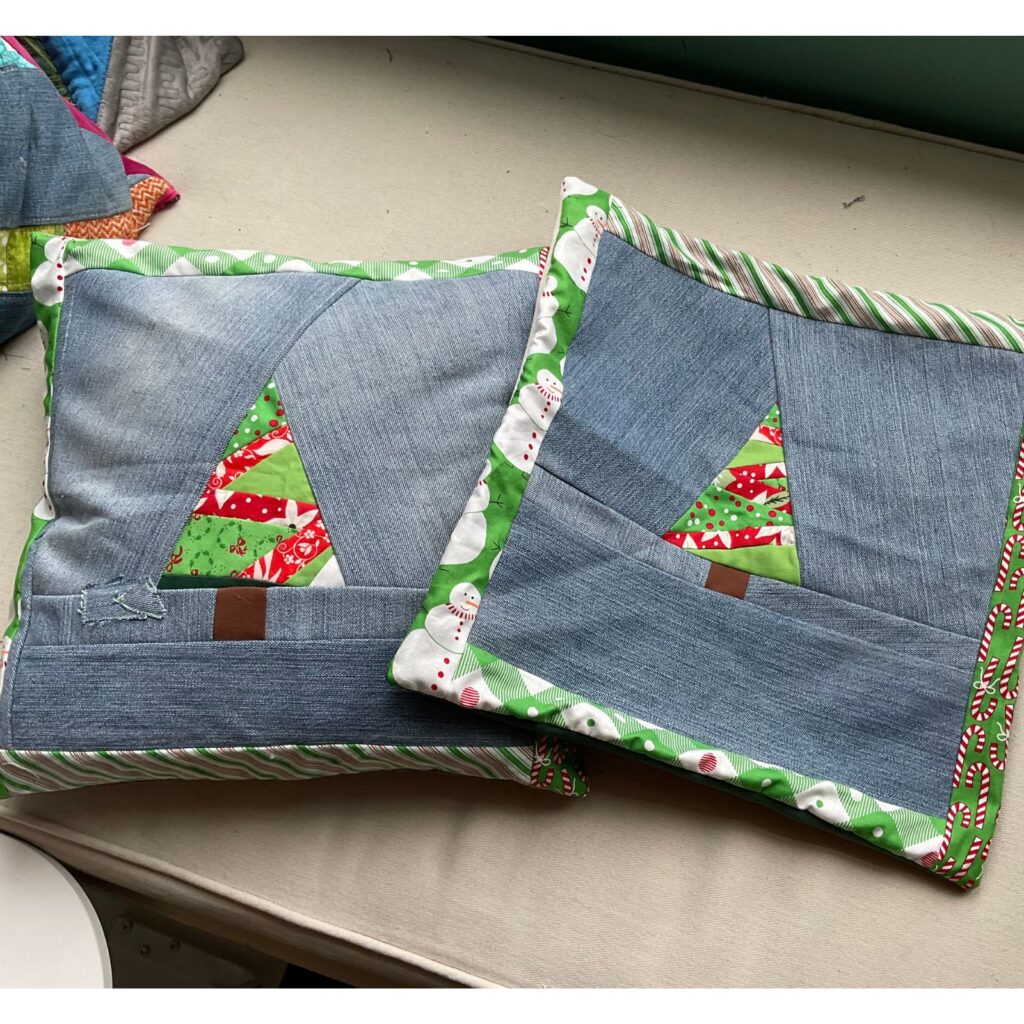
- Cushion Covers: I turned two old Christmas blocks into envelope-back cushions using scraps and velvet remnants. Easy, satisfying, and festive! Find other cushion cover posts here for info on adding zippers or envelope backings.
- Wall Hangings: Quilt your block up, bind it and add some hanging corners, or skip the binding and pop it in a frame for some lovely quilty wall art!
- Placemats: One block + side panels = instant placemat. I’ve even written a big blog post about quilted placemat ideas for more inspo!
These projects are perfect if you want to clear space without committing to a big quilt.
Easy Quilt Tops from a Grouping of Blocks or a Leftover Section
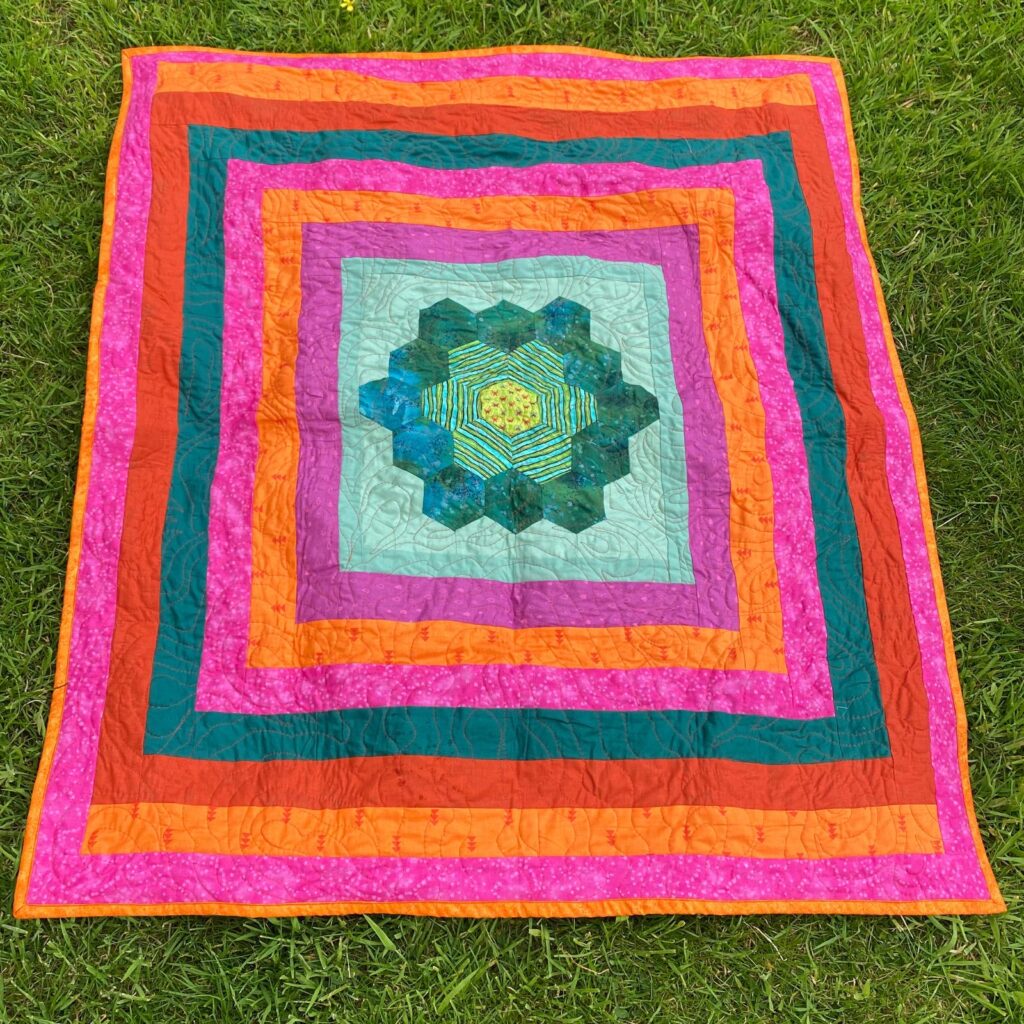
I created a simple kids’ quilt by adding borders around a panel of orphan blocks. The grouping I used as the centre of my quilt was actually one I’d bought off of someone else – but you could easily piece a small grouping of leftover orphan quilt blocks together as your own central panel.
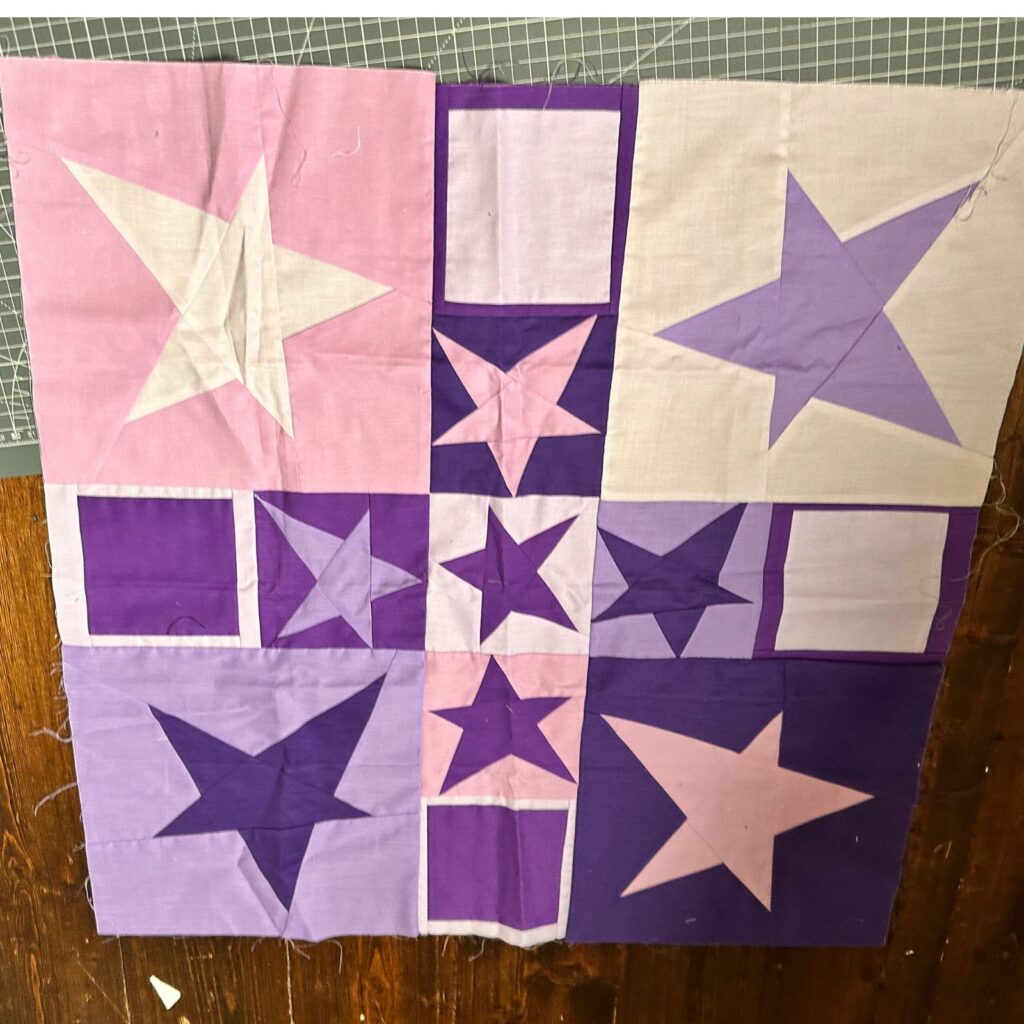
All I did was find fabrics in my stash that coordinated/matched with the fabrics in the quilt blocks and I just kept ‘bordering it up’ – as in adding border after border after border, until it was big enough to be a finished quilt top.
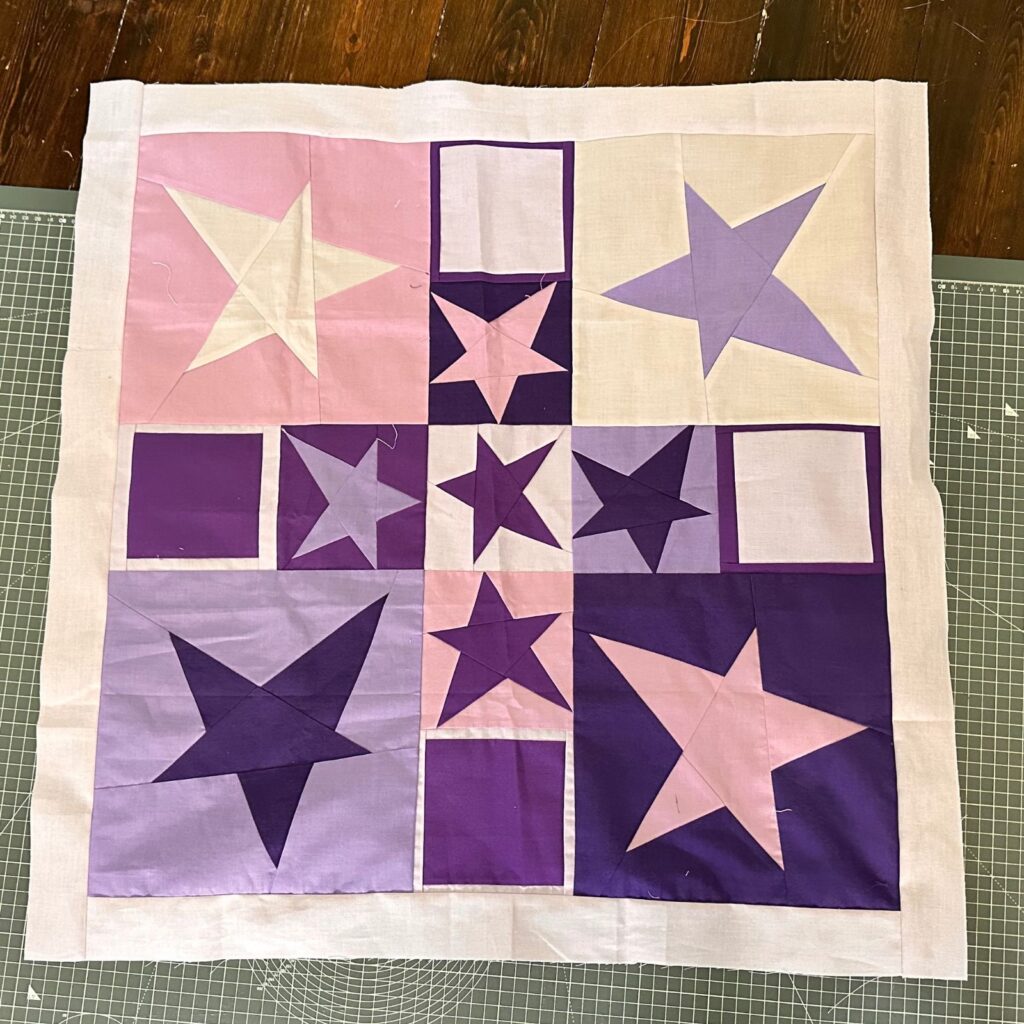
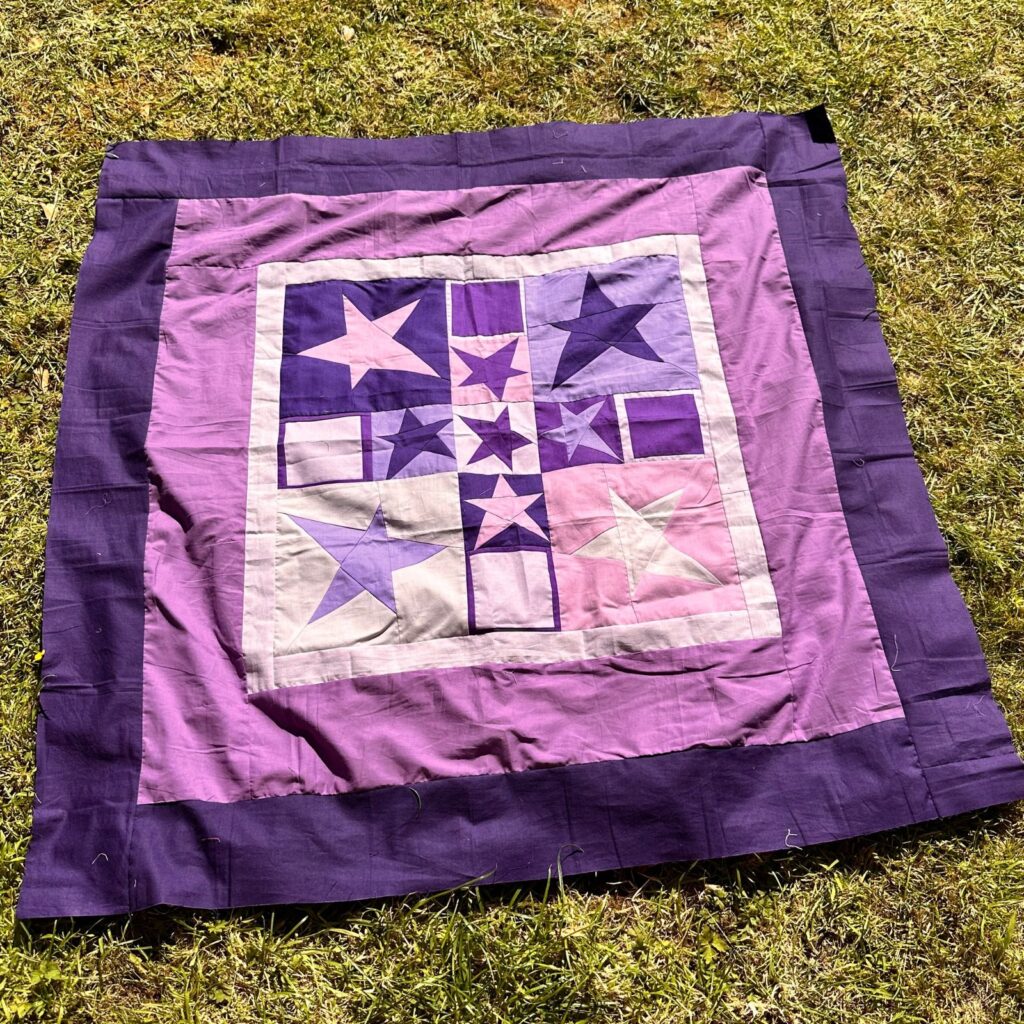
Purple isn’t usually my color, but my son loves it — and this panel became a finished top with no new blocks required. If you have a few coordinating blocks, try grouping by color or style, and keep adding borders until it feels “done.”
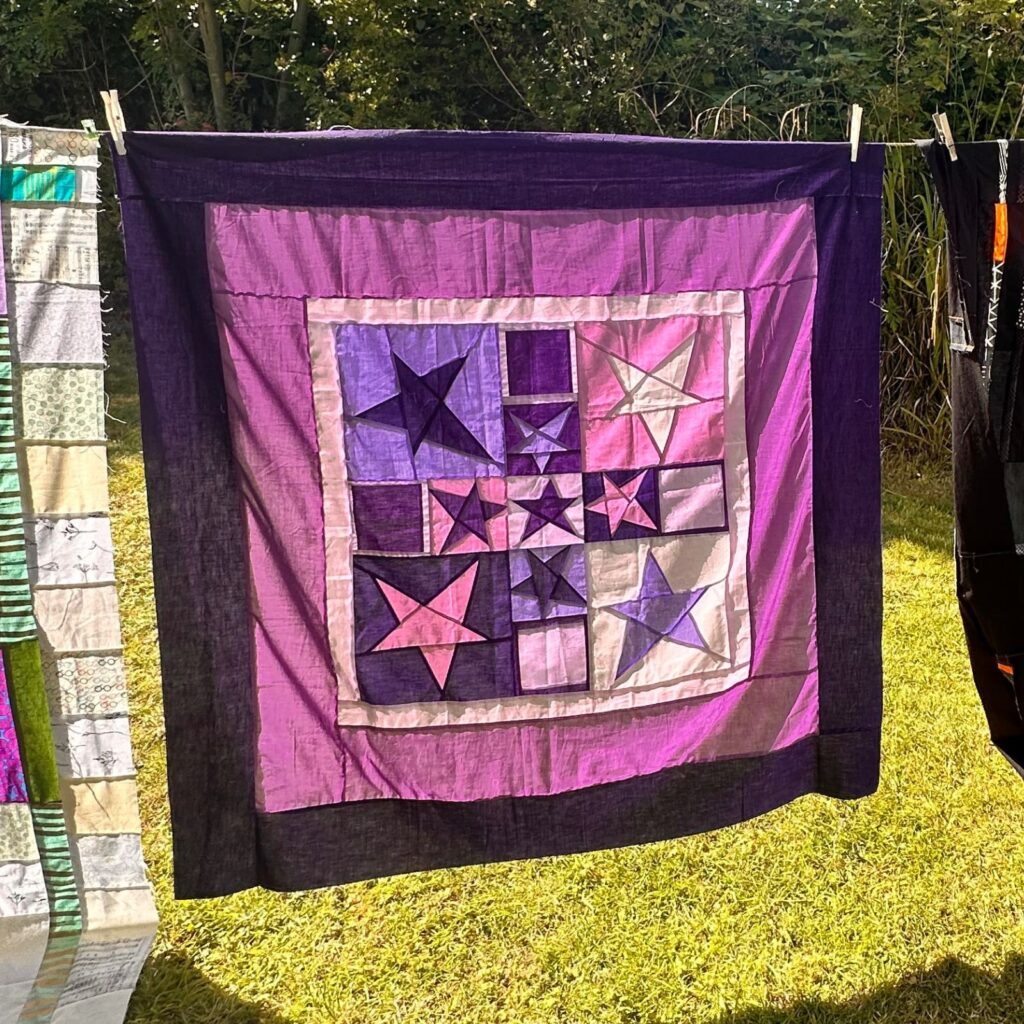
Below is an example of another quilt done in the same way – with just one central block, and the rest borders!
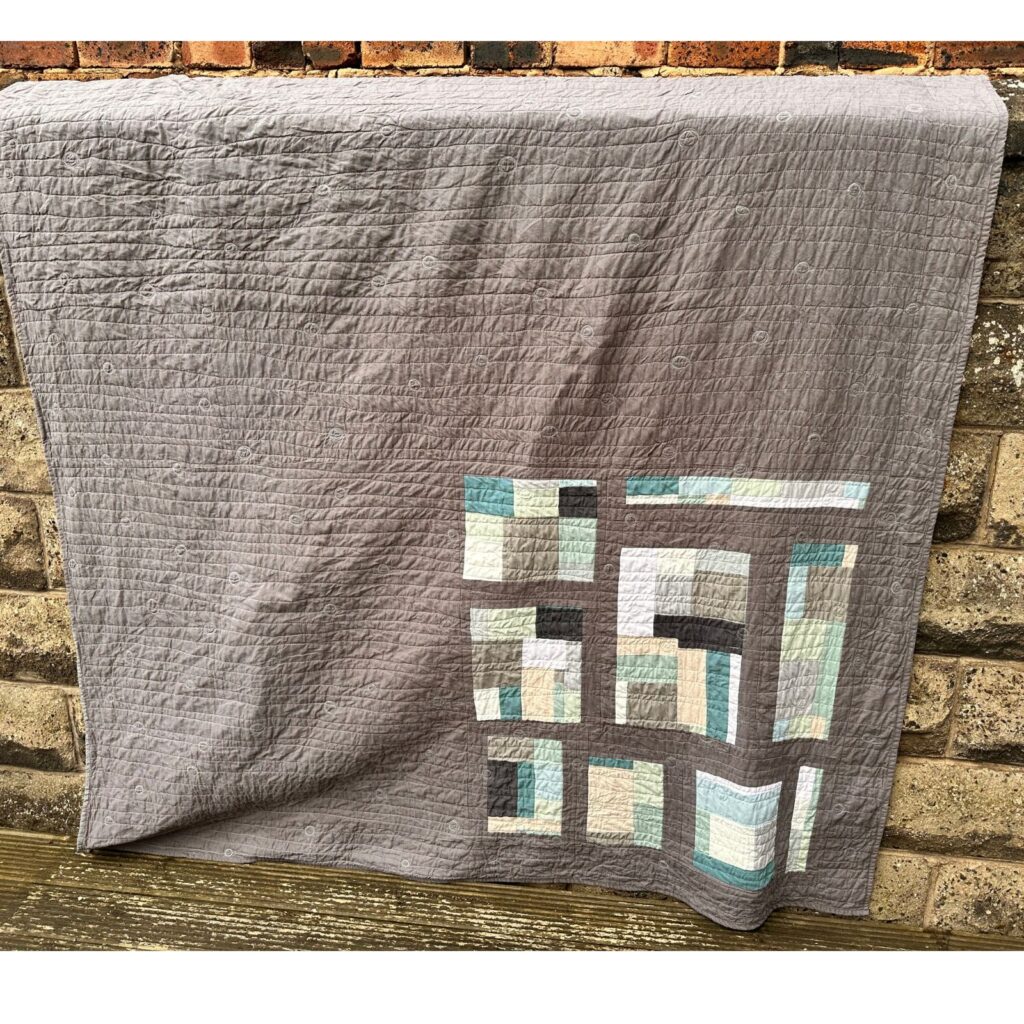
Slotting Blocks into a Grid
Got blocks that co-ordinate with each other because of color or style, but not enough to make a whole quilt top?
Slot them into a grid layout by standardizing their size:
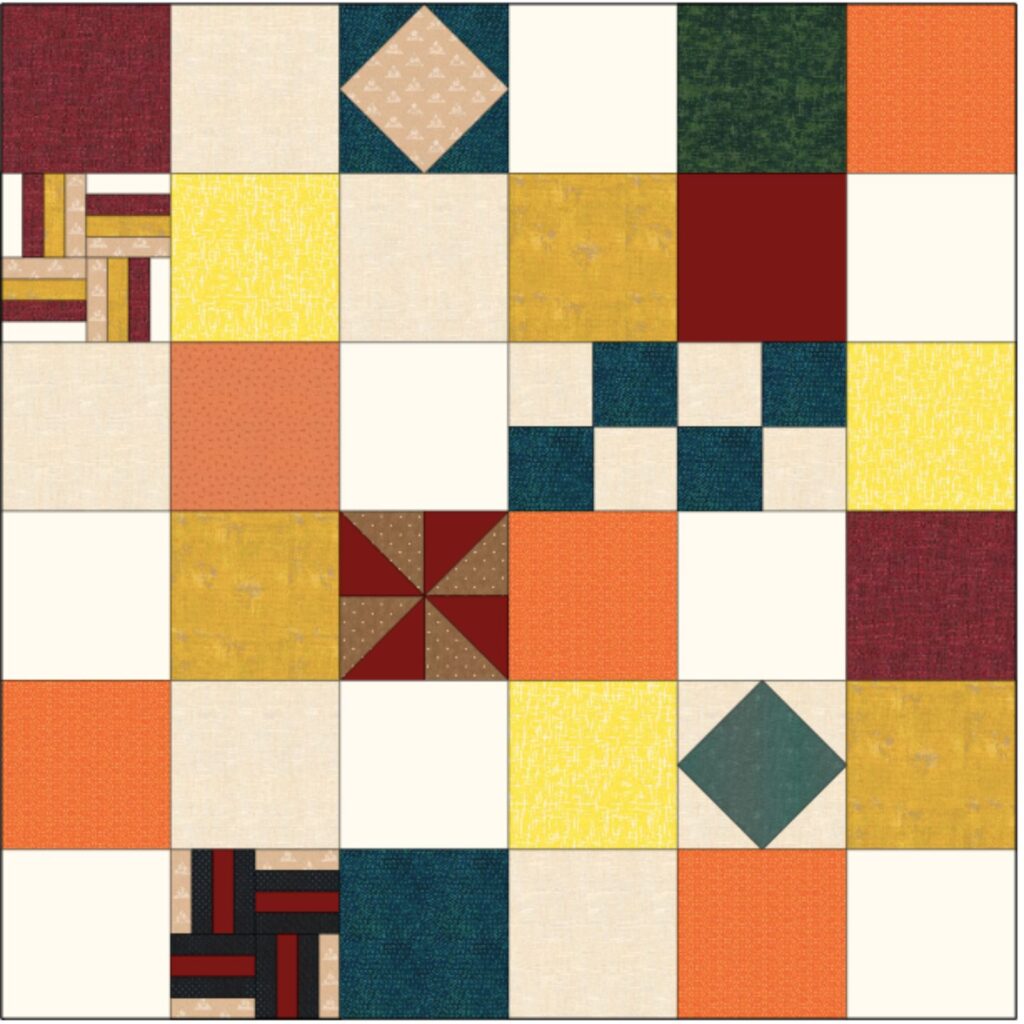
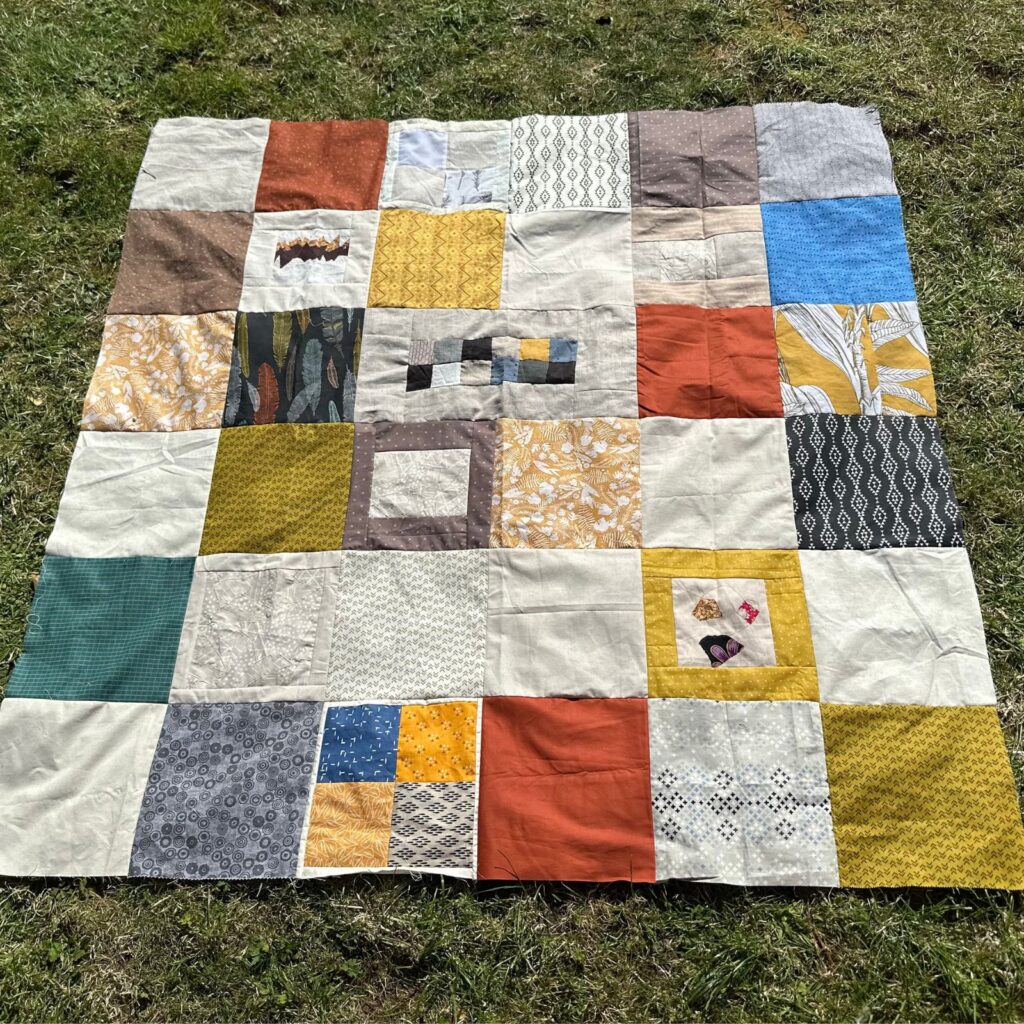
- My beige/brown/maroon quilt used a layer cake-style grid — each block fitted into a 10″ square slot.
- I added sashing to increase the size of my orphan blocks to fit the layout, trimmed where needed, and let visual cohesion lead the way.
These were the orphan blocks I wanted to use that I thought coordinated with each other – very different styles – and definitely not enough to make a quilt top on their own.
So I pulled out some coordinating layer cake squares I had left over and created a grid to slot them into.
Tip: Watch out for seam allowances — every join eats up half an inch, so size accordingly.
I had one section of this quilt where my orphan block was wider than 10″ and I didn’t want to cut it, so I sized it up to the size of two layer cake squares pieced together. So 10″ high but 19.5″ wide to take account of the 1/4″ seams where the two squares would have joined.
Scrappy Charm Pack Quilt
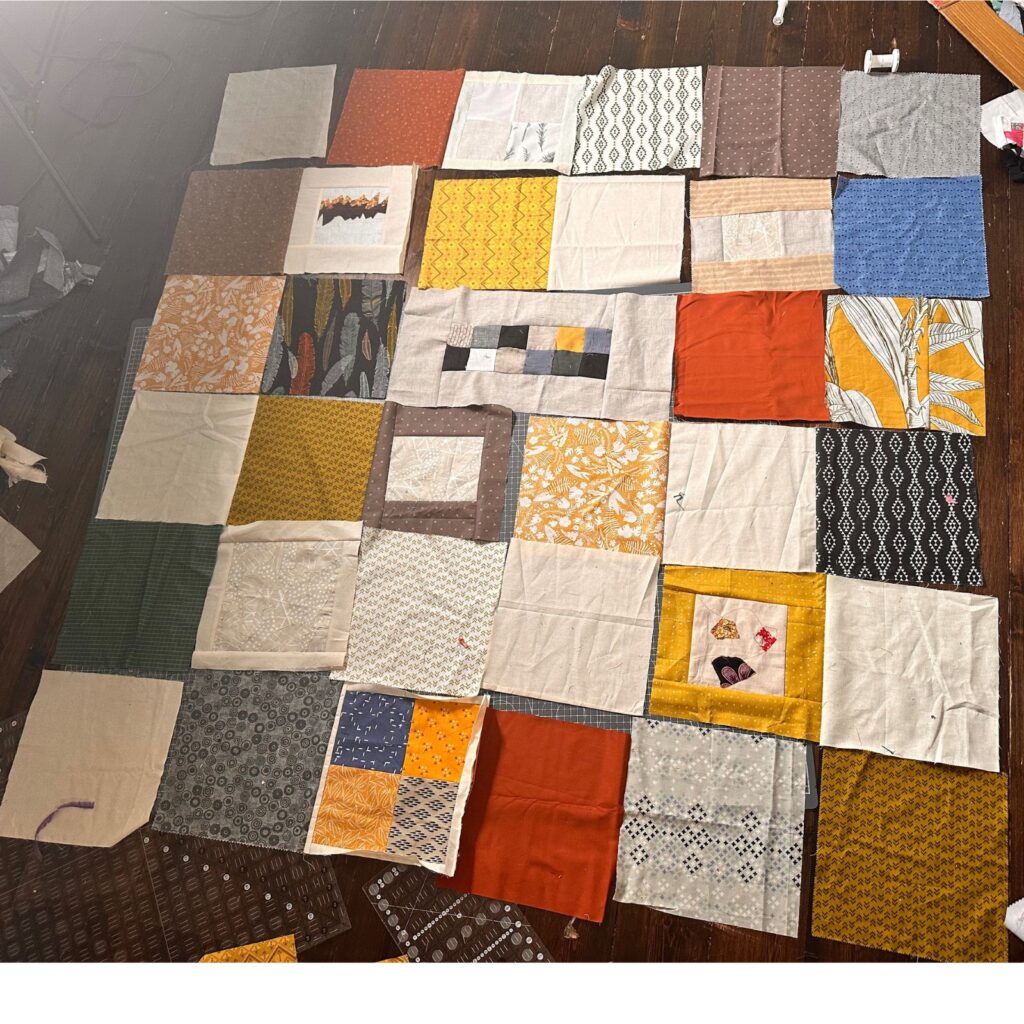
Another quilt top I finished used 5″ charm pack squares mixed with orphan blocks in a similar way.
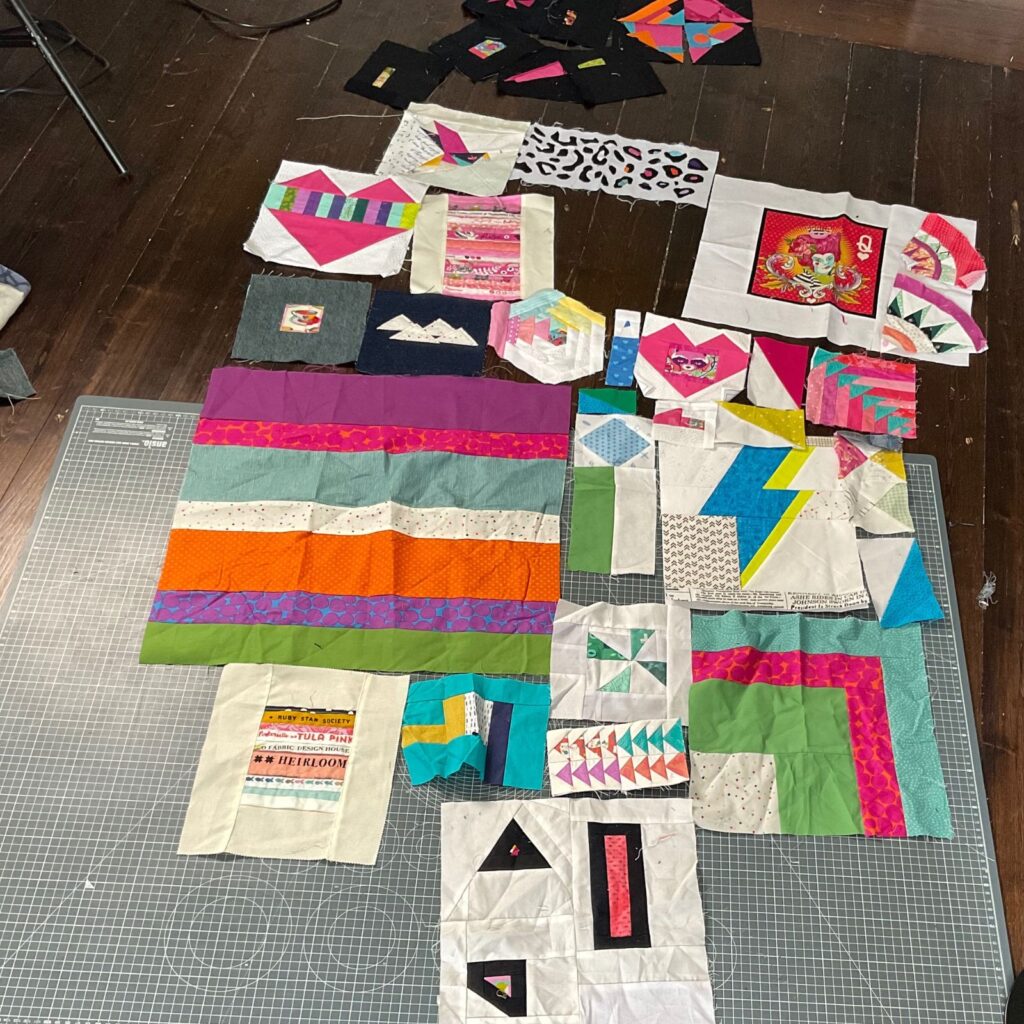
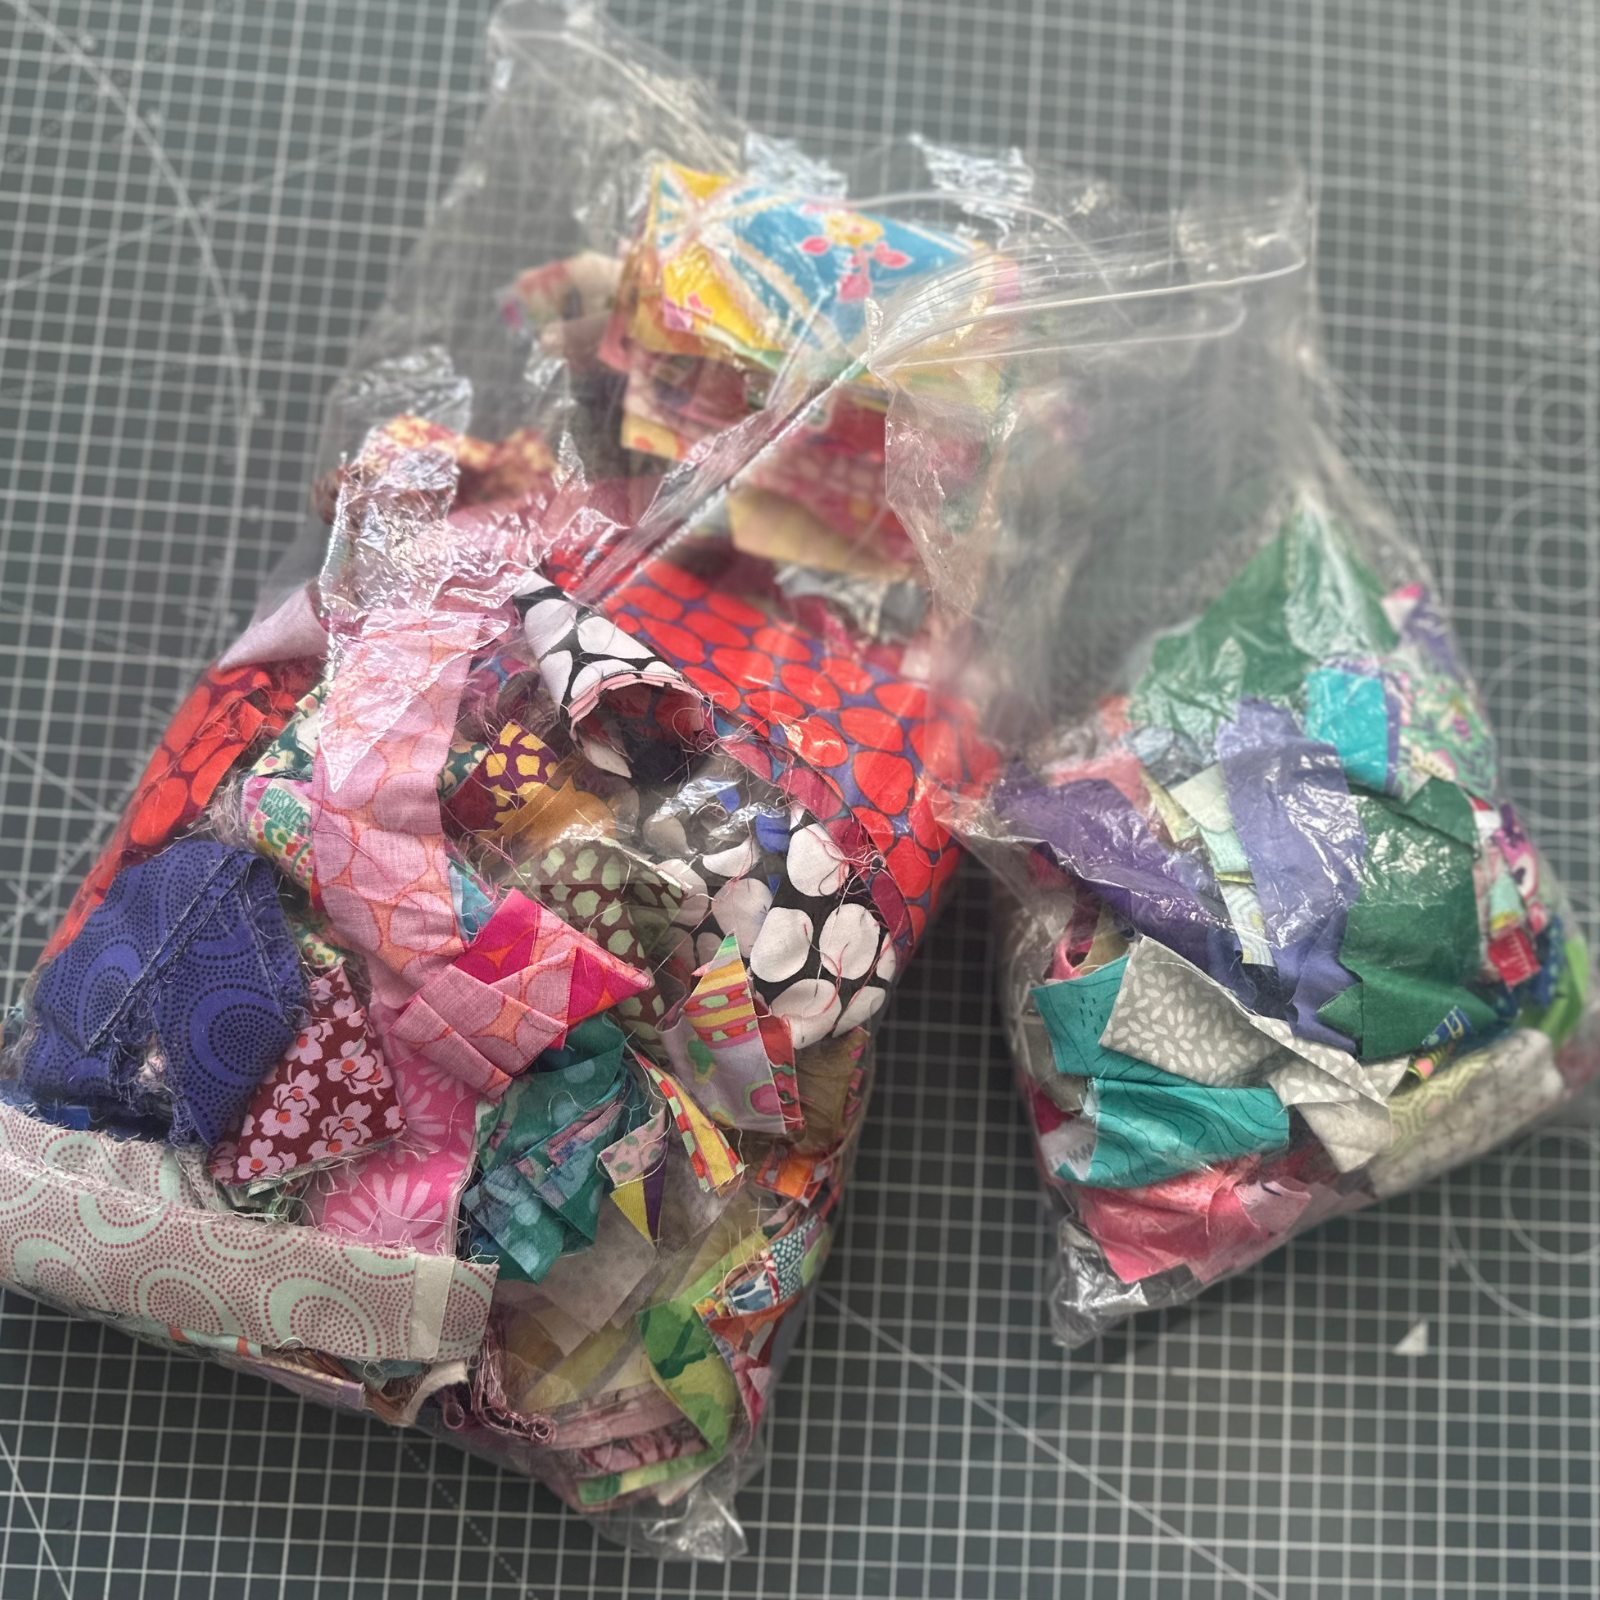
I started with a group of colourful orphan quilt blocks that I had grouped together – they didn’t all make it into the quilt but this was my first pile!
Then I remembered I had some pairs of low volume charm pack squares already partially pieced together from another project that I could use as a background fabric.
The difference was that instead of trying to make my orphan blocks 5″ each, I created sections with my orphan blocks that could slot into rows of 5″ squares. So one ‘section’ might span 4 or 5 charm pack squares joined together – very similarly to the one ‘double block’ in the layer cake quilt.
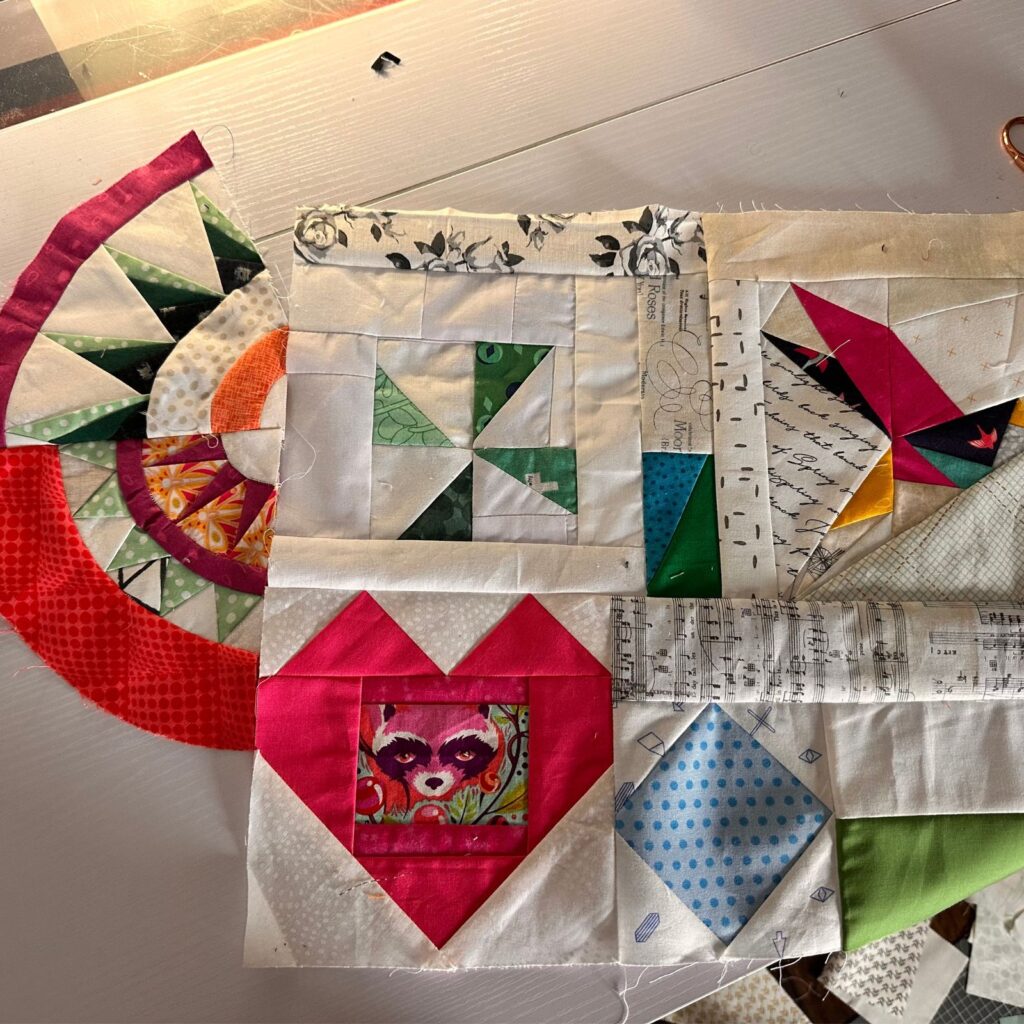
I didn’t stick rigidly to math — I just let improvisation guide the layout. Some blocks were sashed, others joined in creative ways, and it turned into a colorful, joyful jigsaw.
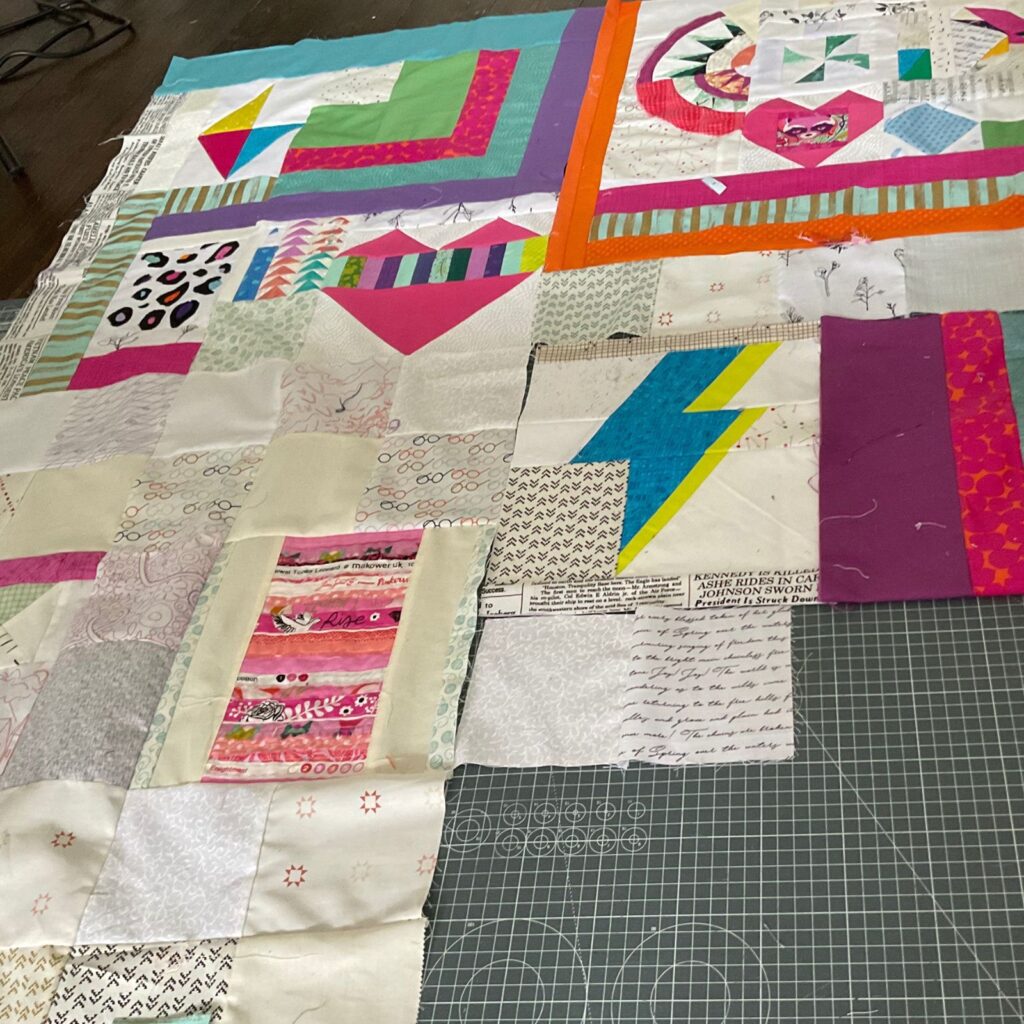
I gave myself the rule that I wouldn’t trim the charm pack squares that I was using as my background. If the orphan block section didn’t fit with them it needed to be trimmed down, or another strip of colour needed to be added to make it bigger. I really like how the sashing strips (some people call them ‘coping’ strips) add to the colourful and playful look of this quilt!
This one was slower but incredibly fun – and it still only took me a couple days of puzzling out. If you love working spontaneously, but still with some structure, this method is a blast.
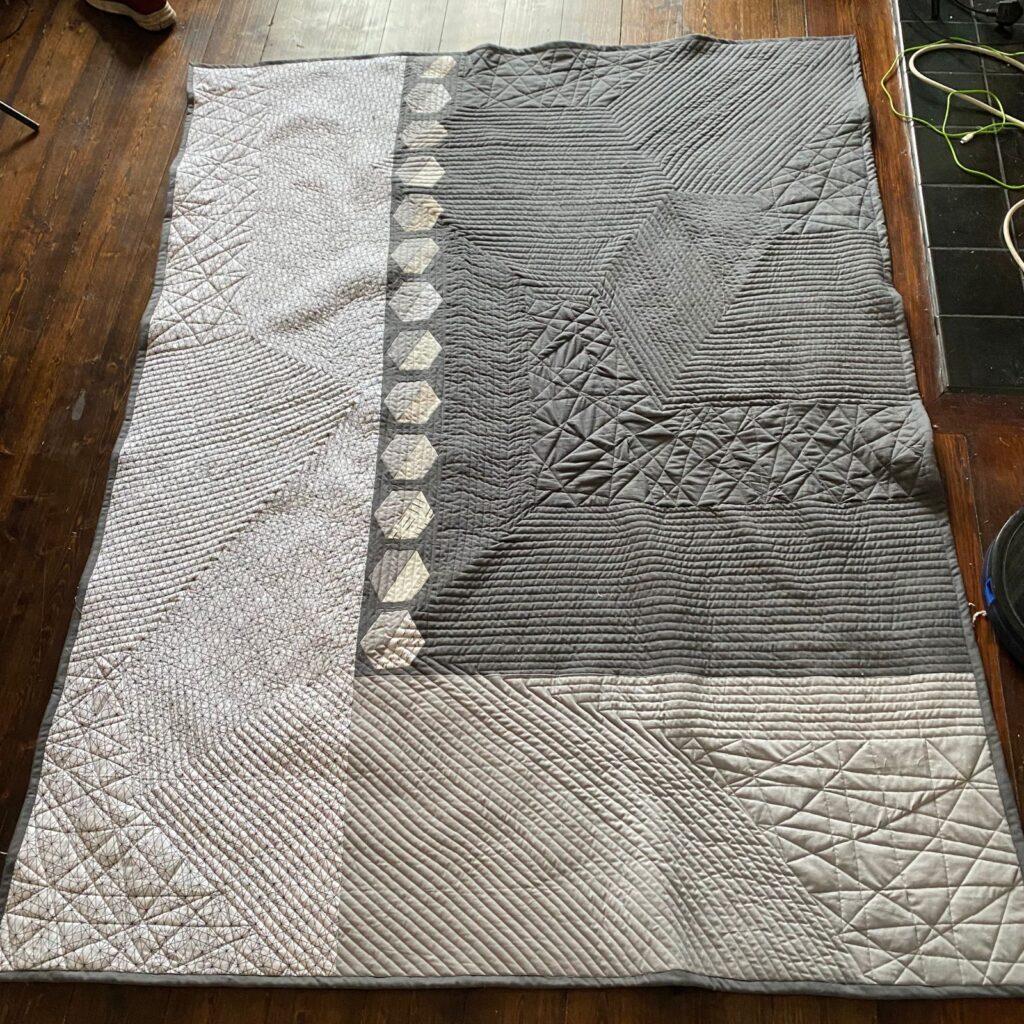
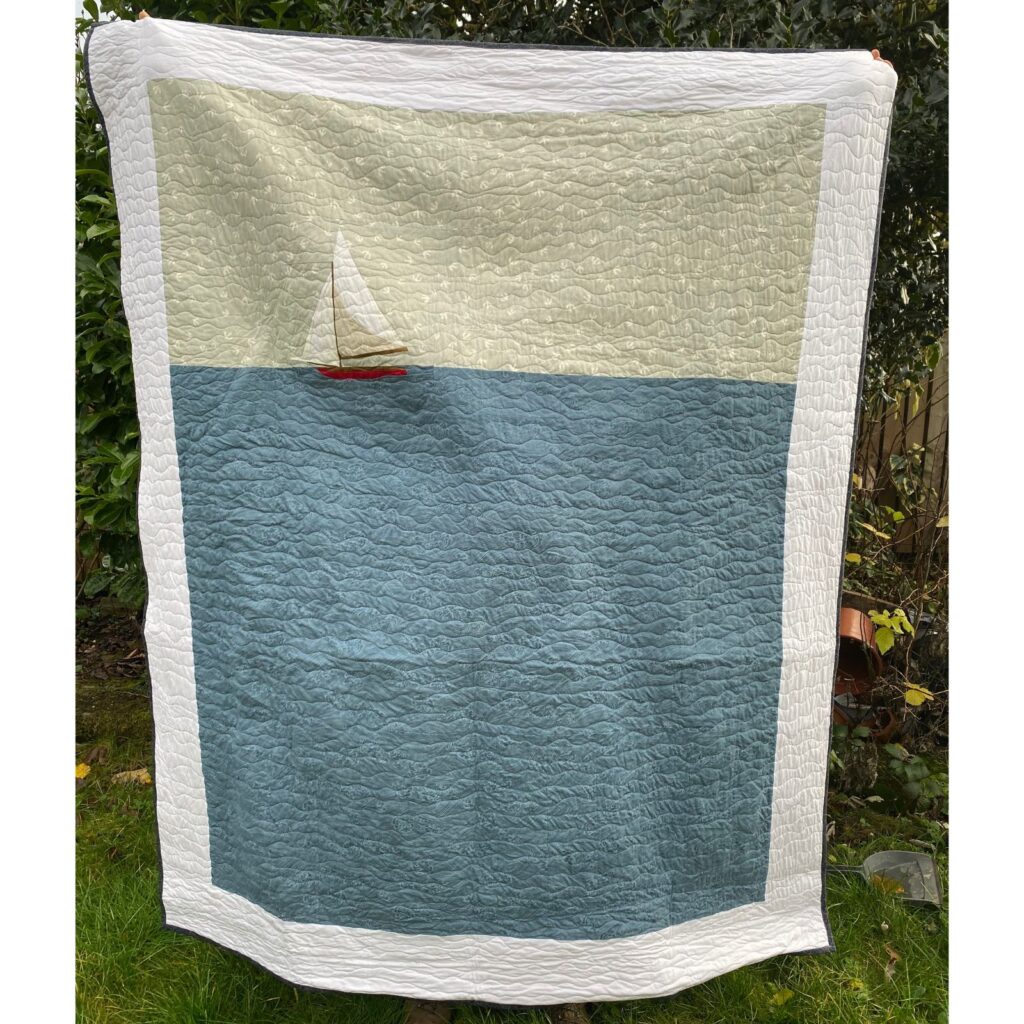
Embracing Negative Space
You don’t need a full set of blocks to make a quilt. Just take one row or block and surround it with background fabric:
- I have made quilts for loved ones with just a single row or one main block.
- Let your orphan block become the focal point and let negative space do the rest.
It’s minimalist, modern, and gives blocks a stage to shine.
Here are some examples of quilts with just a few blocks and negative space:
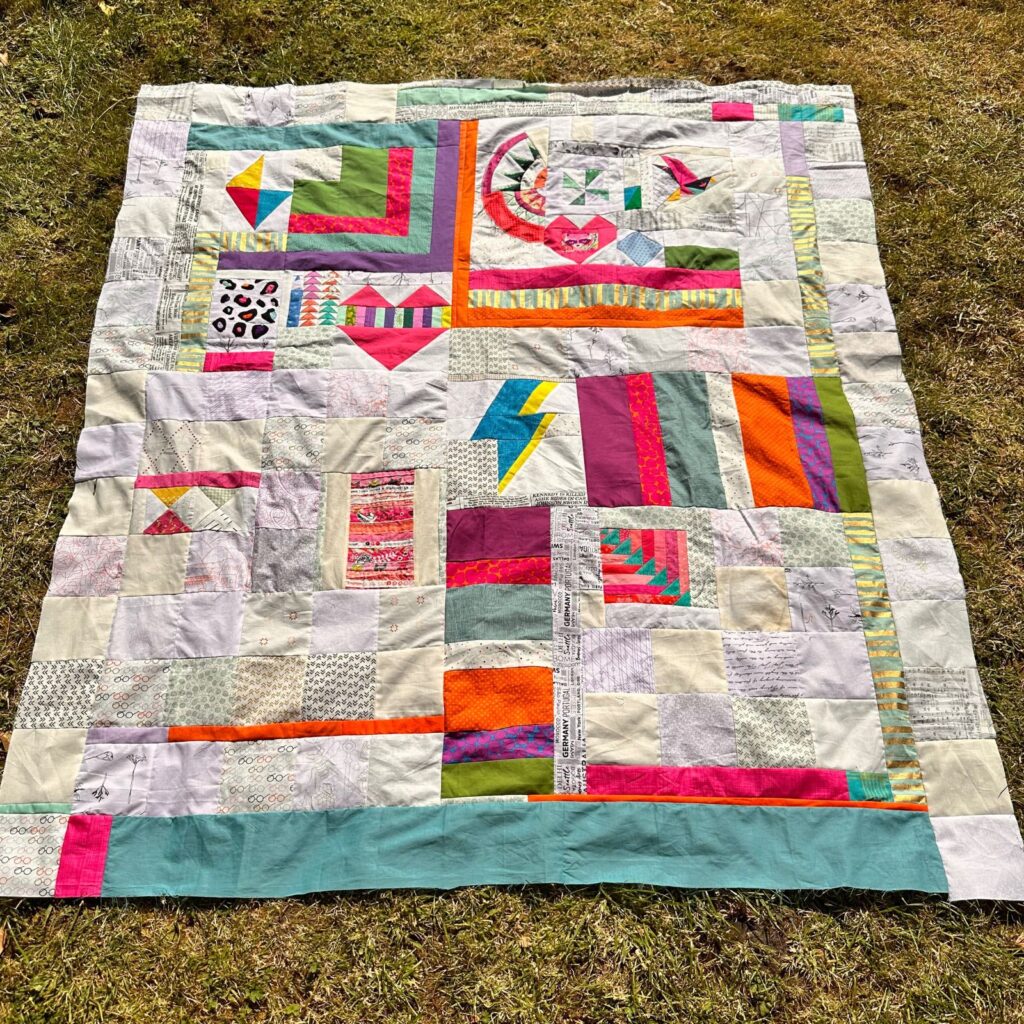
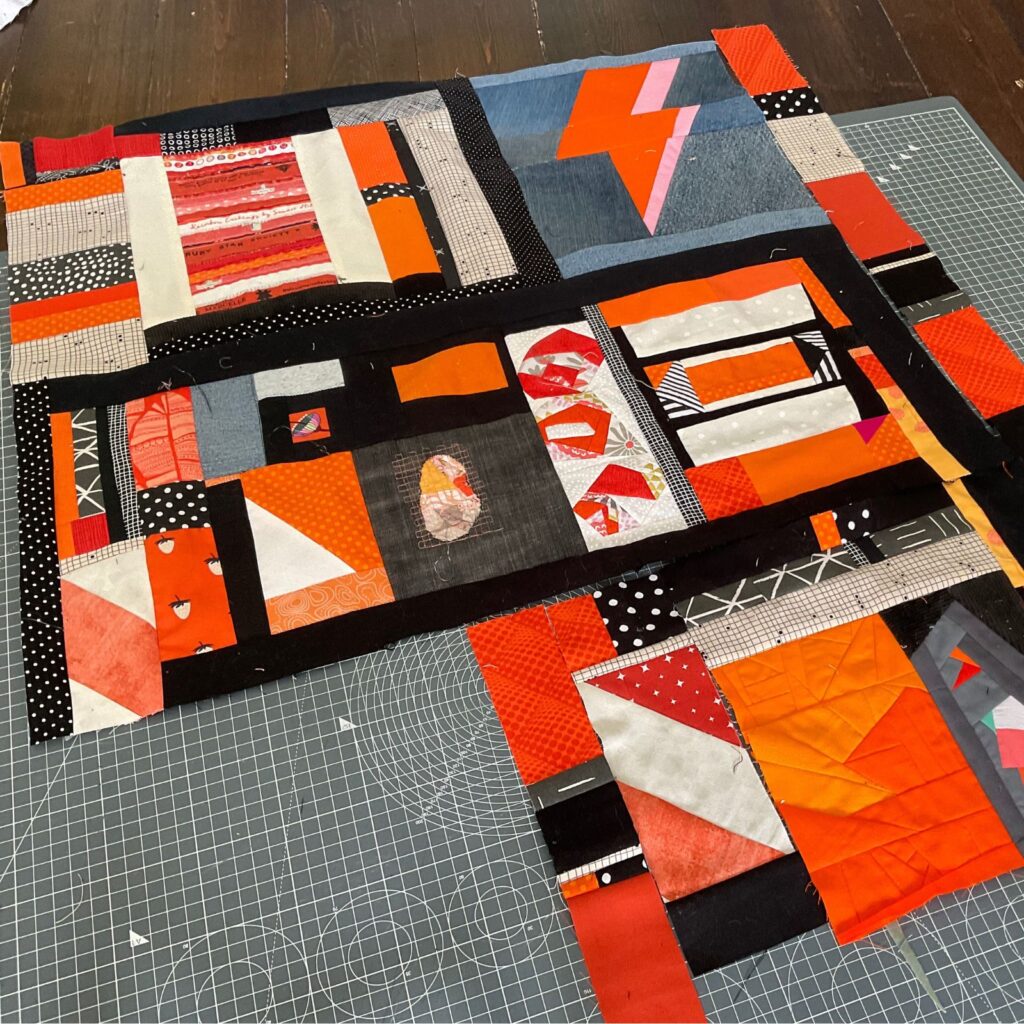
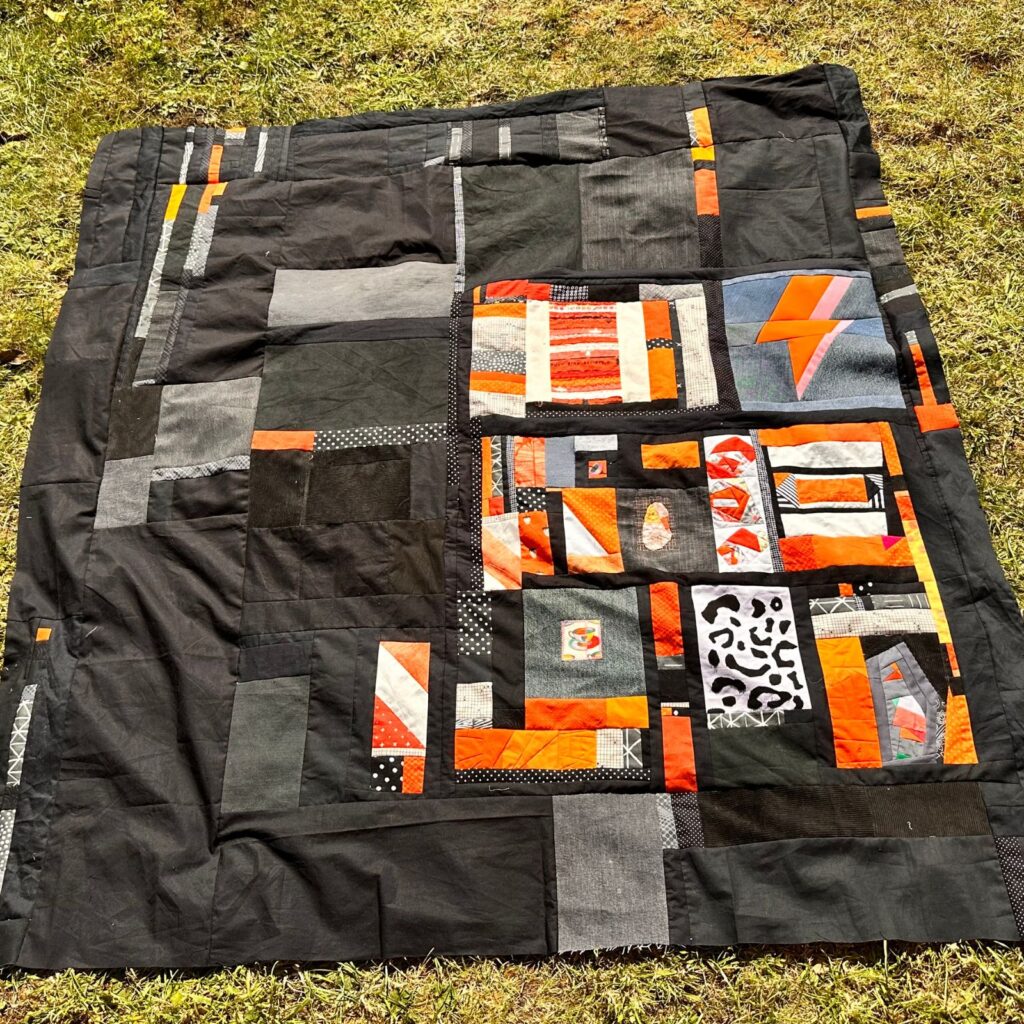
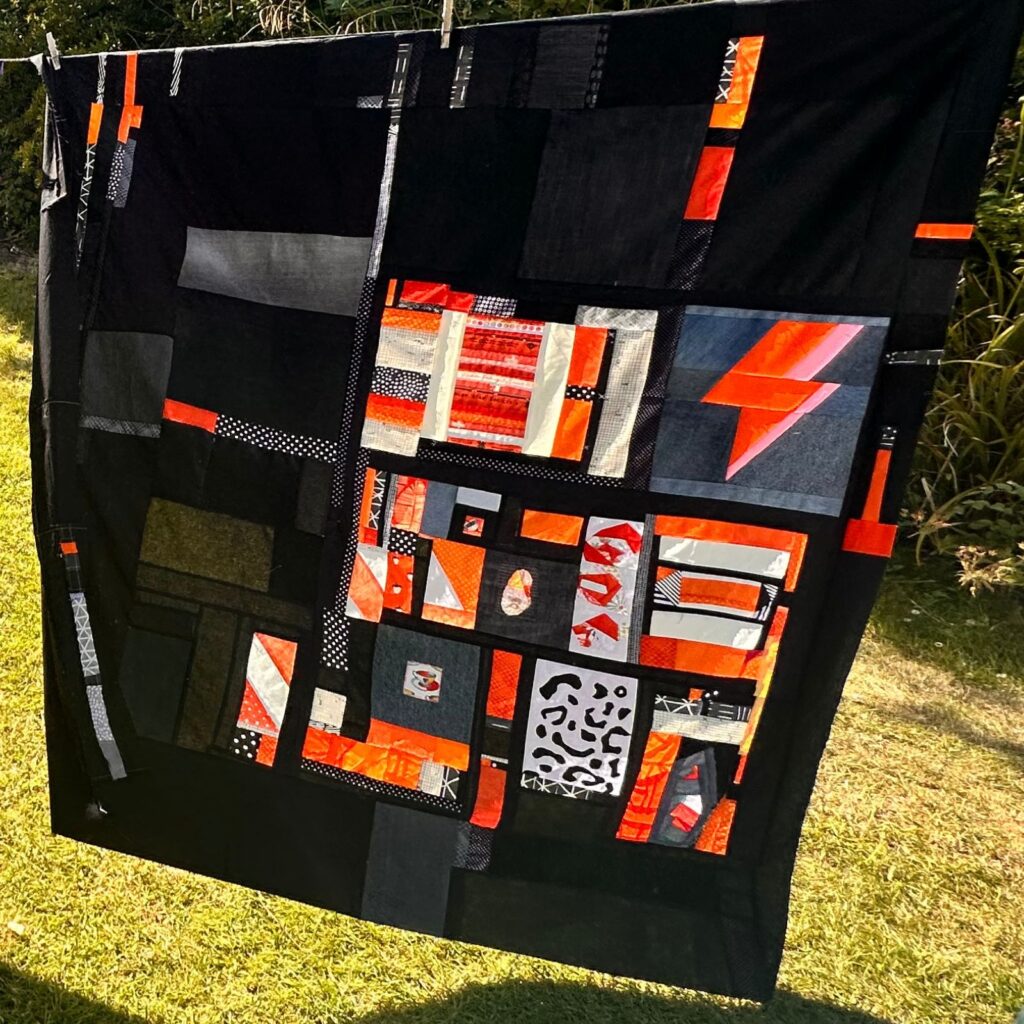
Pure Improv: Set yourself some boundaries & play away!
My most freeform quilt came from grouping together orange, black, and white blocks with coordinating scraps.
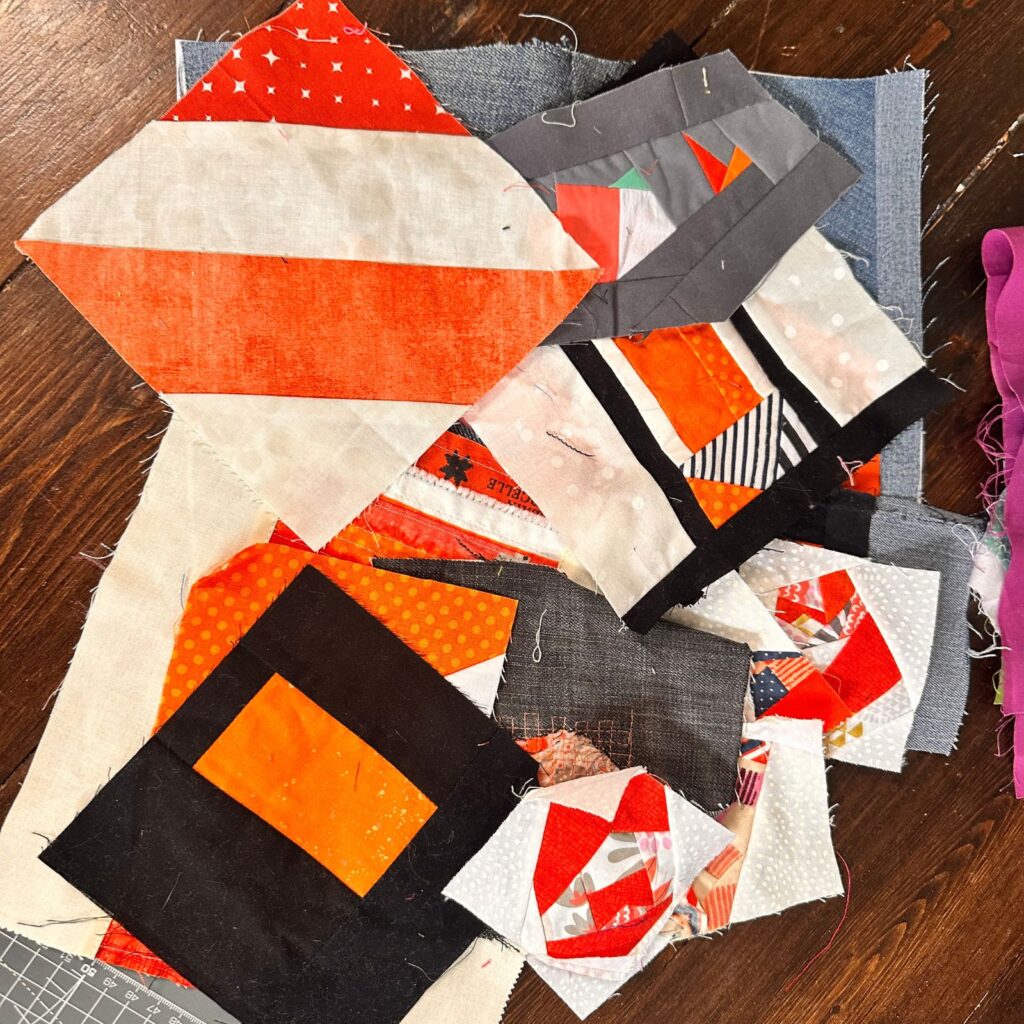
I added black sashing, tied together textures (like polka dots and grid lines), and embraced the randomness.
No measuring. No pressure. Just joyfully experimenting. And it might be my favorite one of all.
The techniques I used for this quilt were:
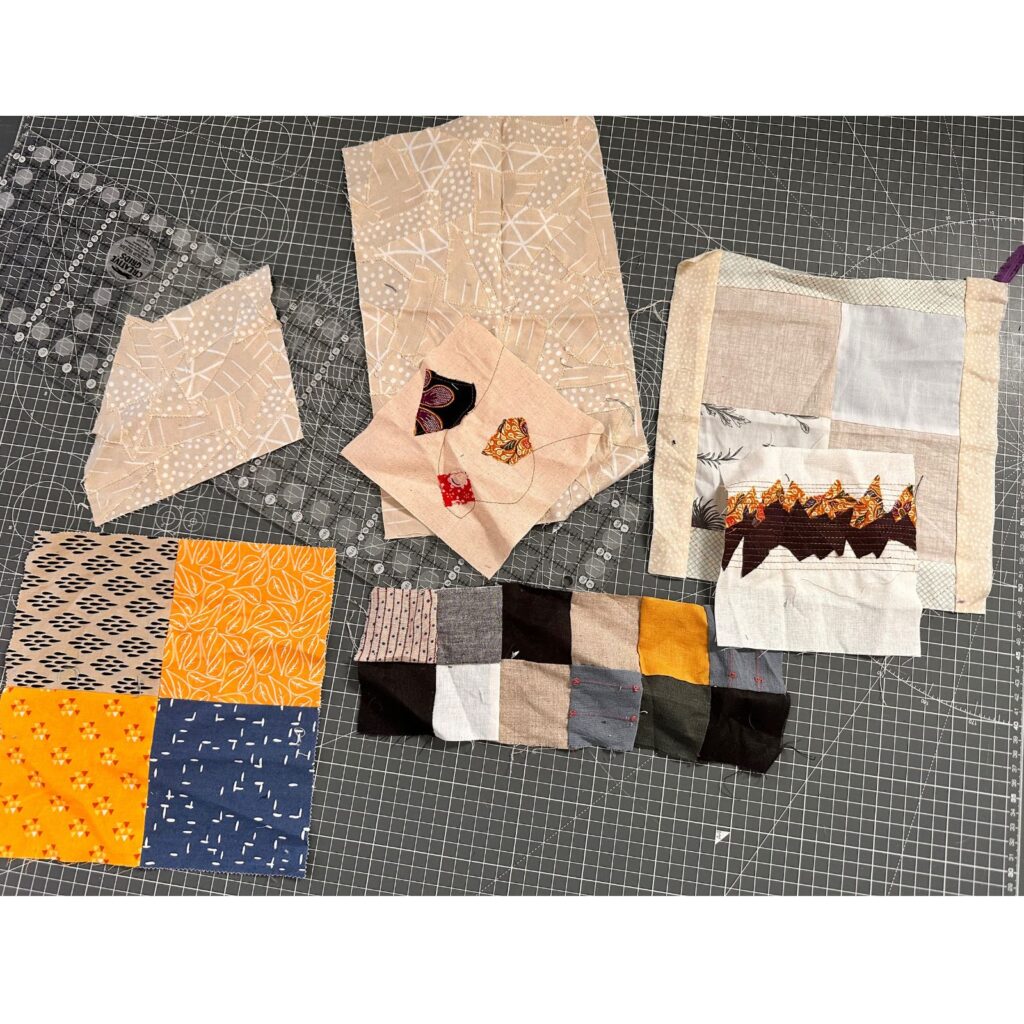
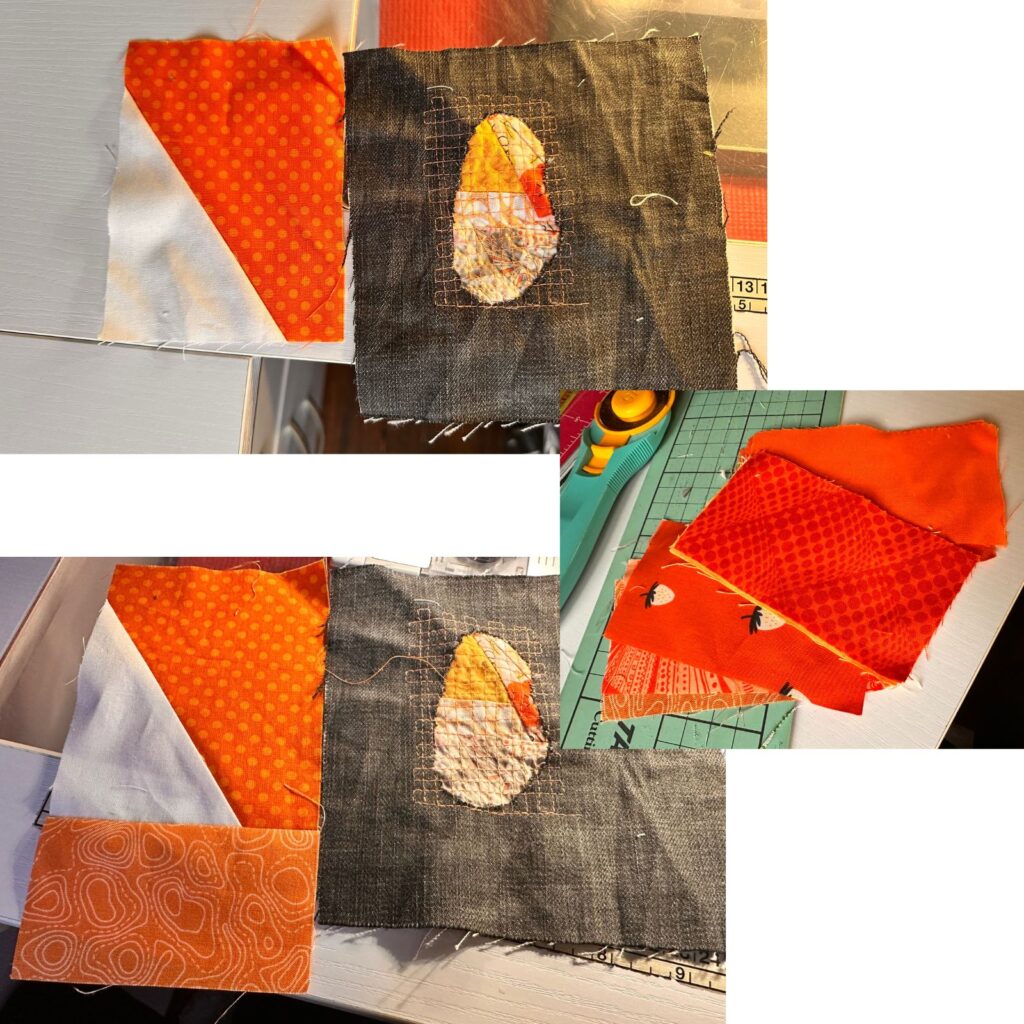
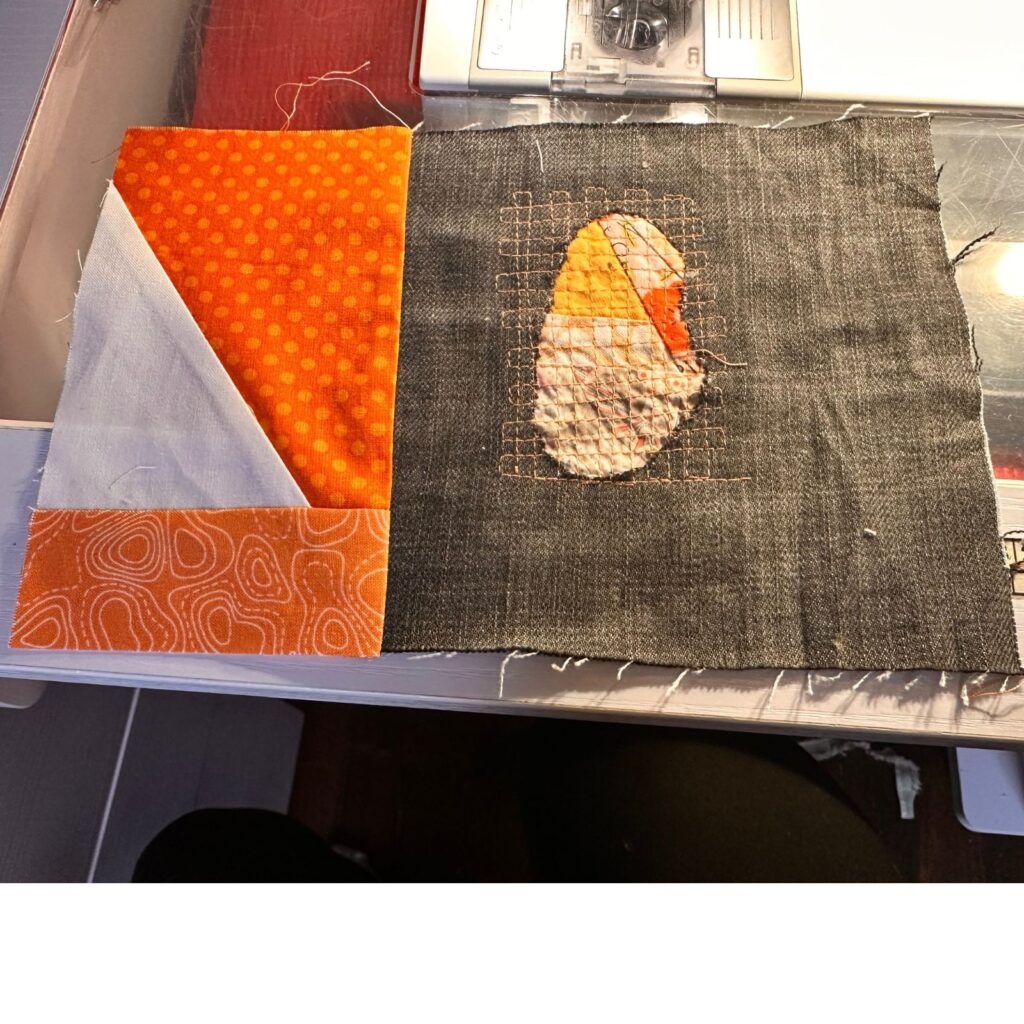
- Limiting my colour pallet and pulling in scraps of fabric and motifs that had already been used in the orphan blocks.
- Using ‘coping’ or sashing strips to make blocks of different sizes fit together (see the images below)
- Using black sashing (though not uniform sashing!) to make sections tie together.
- Lots of scrappy negative space for the black background – I used up a lot of black bits and pieces!
Quilt-As-You-Go Rows
Though not part of this summer’s projects, I’ve previously used the join-and-flip quilt-as-you-go method to build orphan block quilts row by row.
It’s a great option if you’ve pre-quilted blocks or want to work slowly, adding sections over time without raw edges.
Video Version of this Post
Final Thoughts: Let Your Blocks Lead
There’s no pressure to turn every orphan block into a quilt. If you dig into your stash and feel inspired — go for it. If not, maybe now’s not the time.
You might even pass those blocks on to someone else who’s jazzed to use them. My Scrap Club inside Patreon has a spot for members to swap and share blocks with other members.