The Simplest Drawstring Gift Bags Ever (No Measuring, Under 5 Minutes!)
In this post, I’m sharing the quickest, easiest drawstring gift bag tutorial you’ll ever find – and the best part? You don’t feed the drawstring in after sewing. We’re doing it all at once!
These bags are perfect for batch sewing, so you can make a whole stash in one afternoon and have them ready whenever you need to wrap a gift.
I made 64 bags over two days (in little snippets of time), and you can too!
Why should you have a stash of gift bags? People love receiving them (trust me I get comments all the time!), you’ll save money on wrapping paper (cause you can use the fabric stash you have already); and you’ll encourage everyone you gift to to reuse them – spreading the eco-friendly love!
Why You’ll Love This Tutorial
- No measuring required – just eyeball the size you want
- Under 5 minutes per bag once you know the method
- No feeding drawstrings through casings – we sew them in as we go
- Any size works – from tiny gift card bags to large present bags
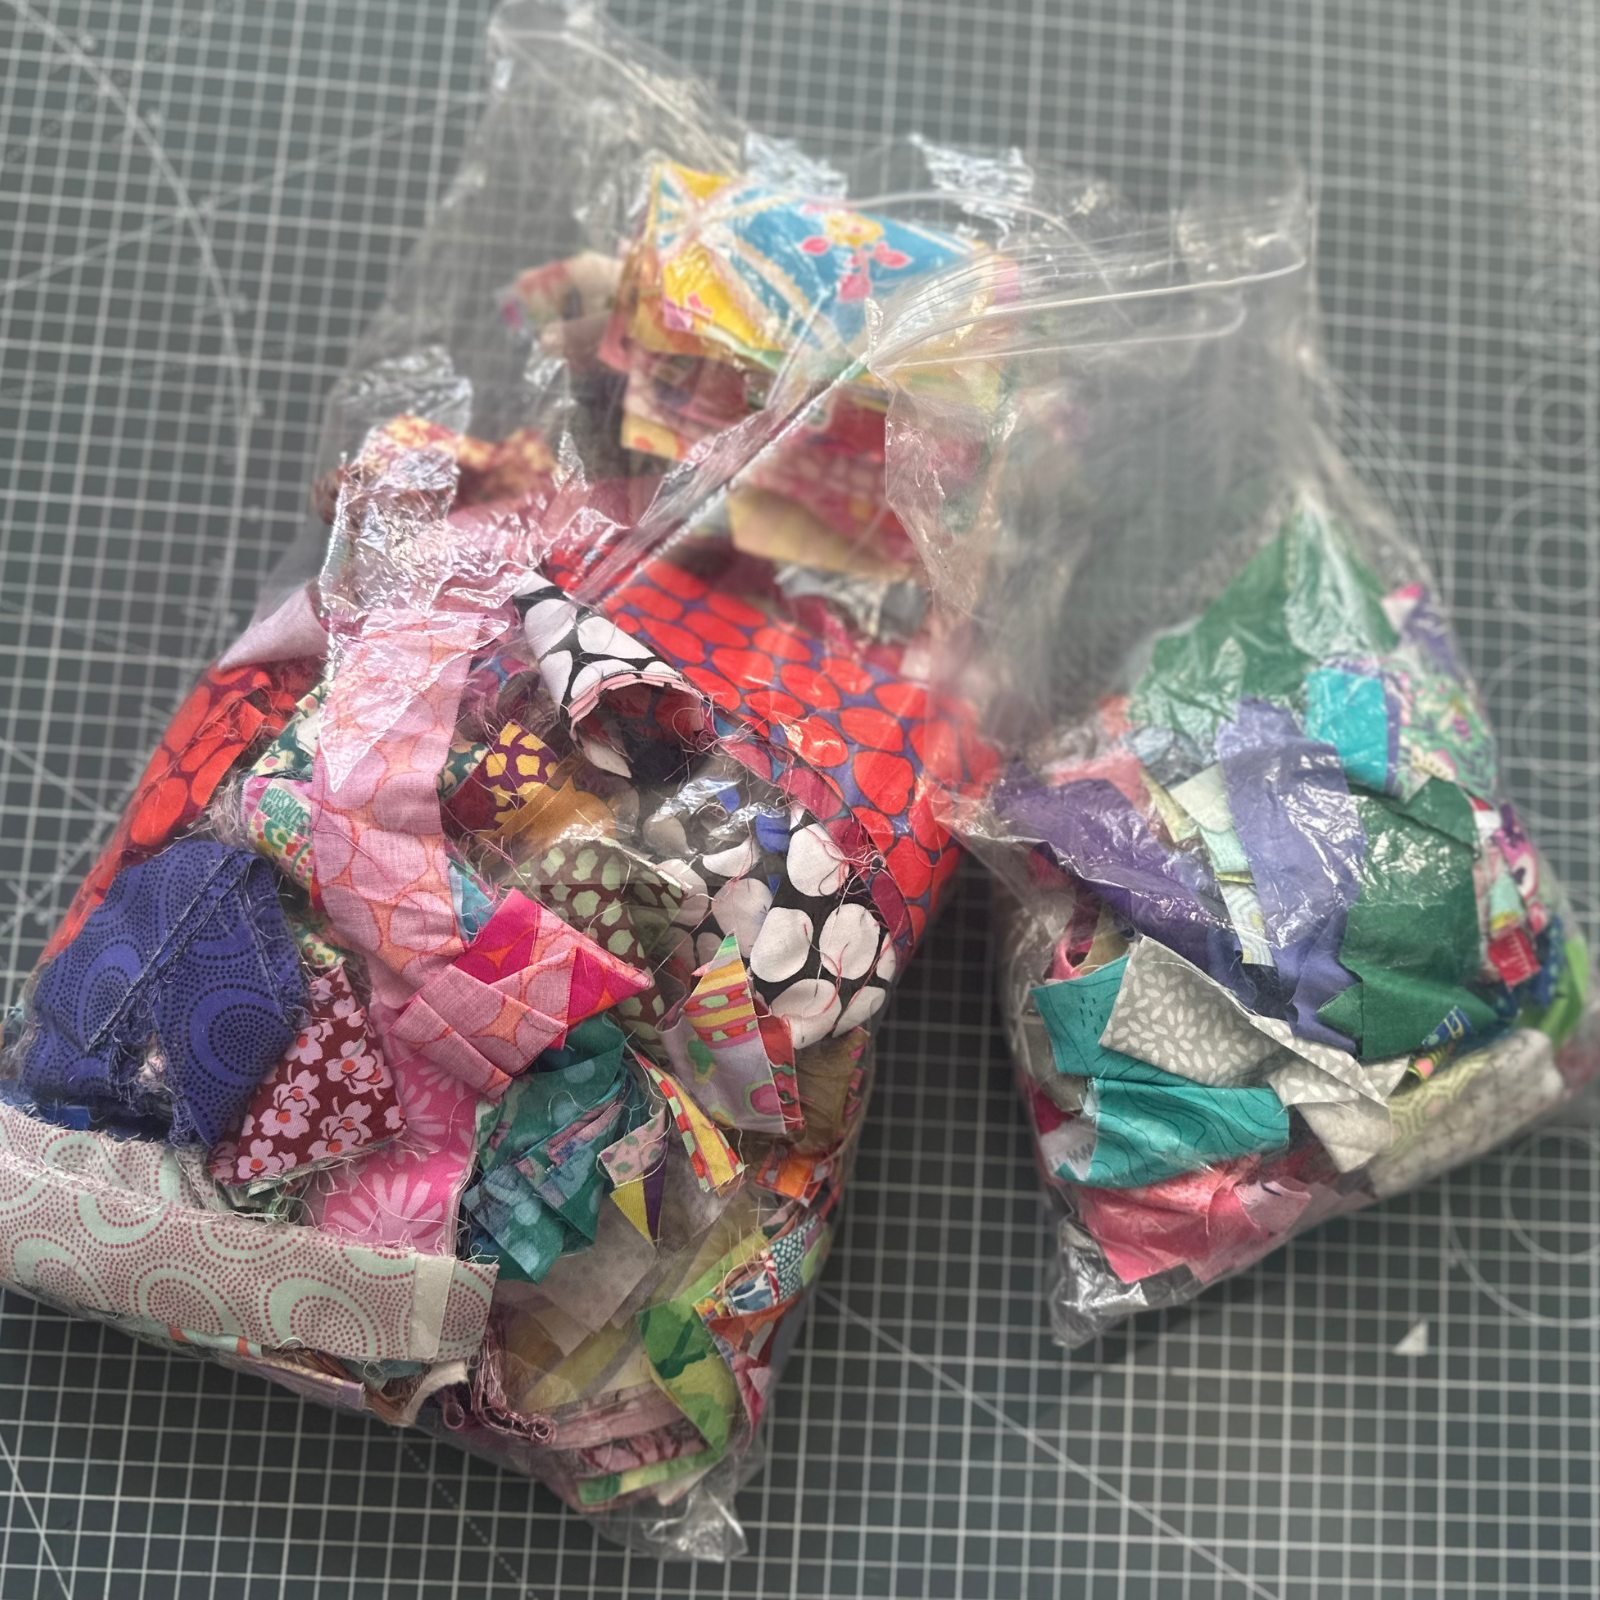
- Perfect stash buster – use up scraps, old curtains, tartan pieces, anything!
- Two methods included – quick version or neat-finish version
Table of Contents
Watch the Full Video Tutorial
What You’ll Need
Materials
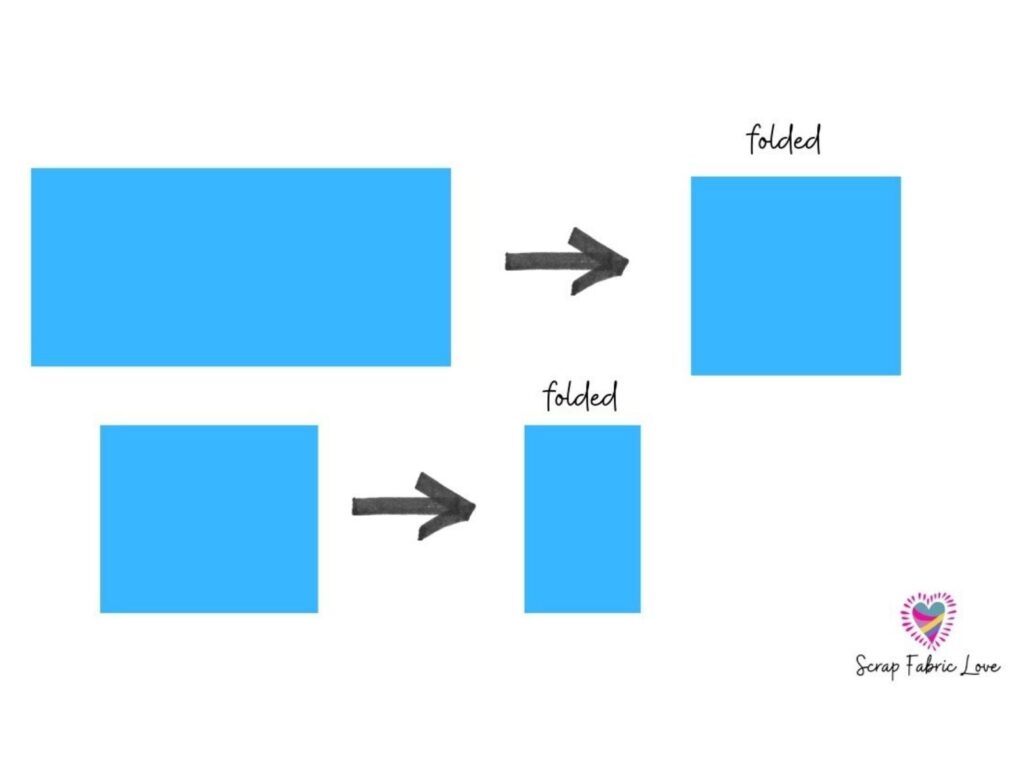
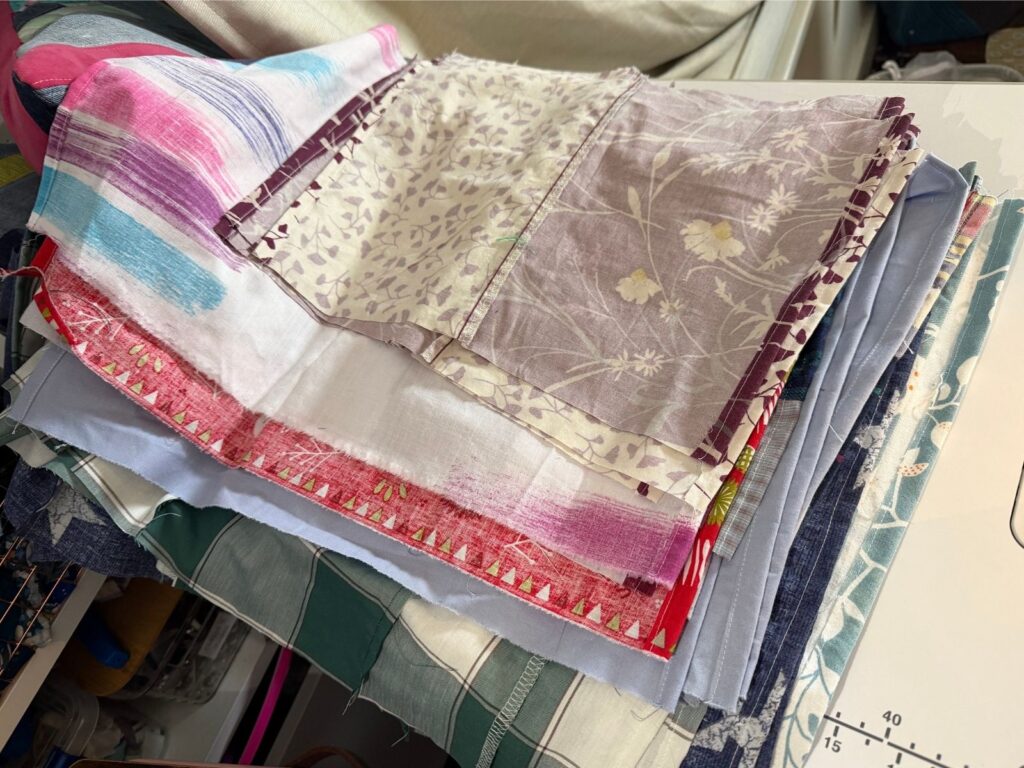
- Fabric pieces – rectangles or squares that fold to your desired bag size
- Rectangle folded = square-ish bag
- Square folded = tall rectangular bag
- OR two equal-sized pieces sewn together that can be folded over to make the size you want.
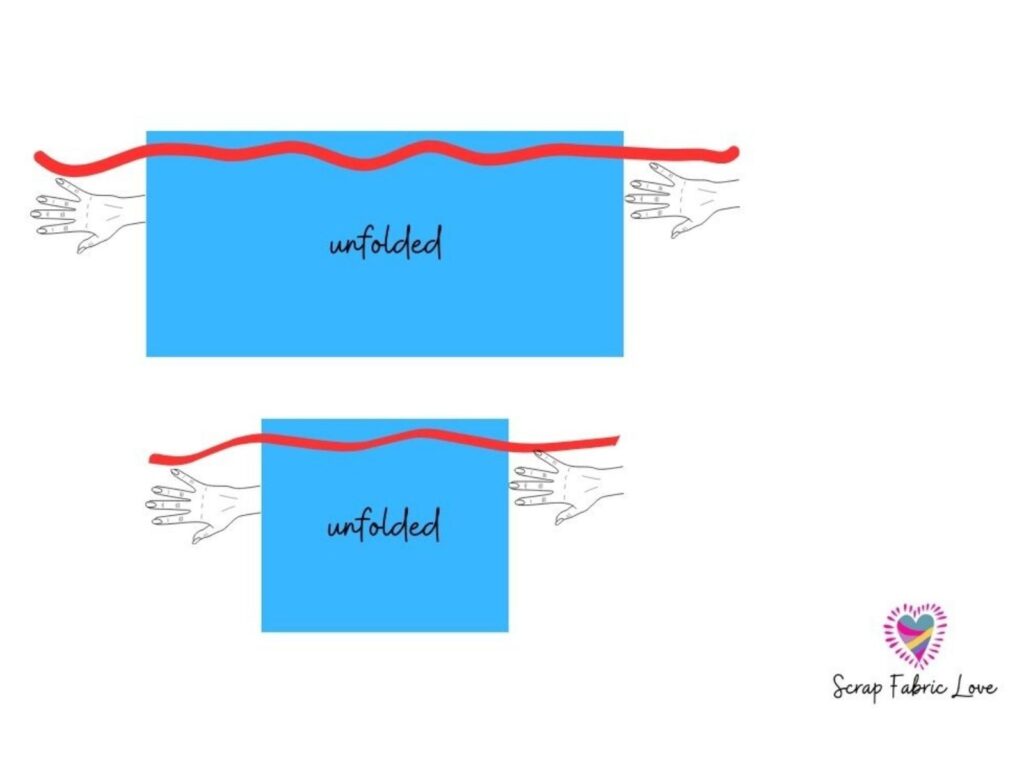
- Ribbon or ties – selvadge edges, seams, curtain ties, or regular ribbon
- Length: width of unfolded fabric + one hand-width on each end
- Matching thread (especially helpful if batch sewing multiple bags)
Equipment
- Sewing machine
- Scissors
- 1 pin per bag (that’s it!)
Quick Overview: How It Works
This tutorial shows you TWO ways to make these bags:
- Quick version – raw edges inside the bag (totally fine, no one’s looking!)
- Neat version – all raw edges hidden for a professional finish
Both methods are fast, and both work beautifully. Choose what suits your timeline and preference!
The Basic Steps
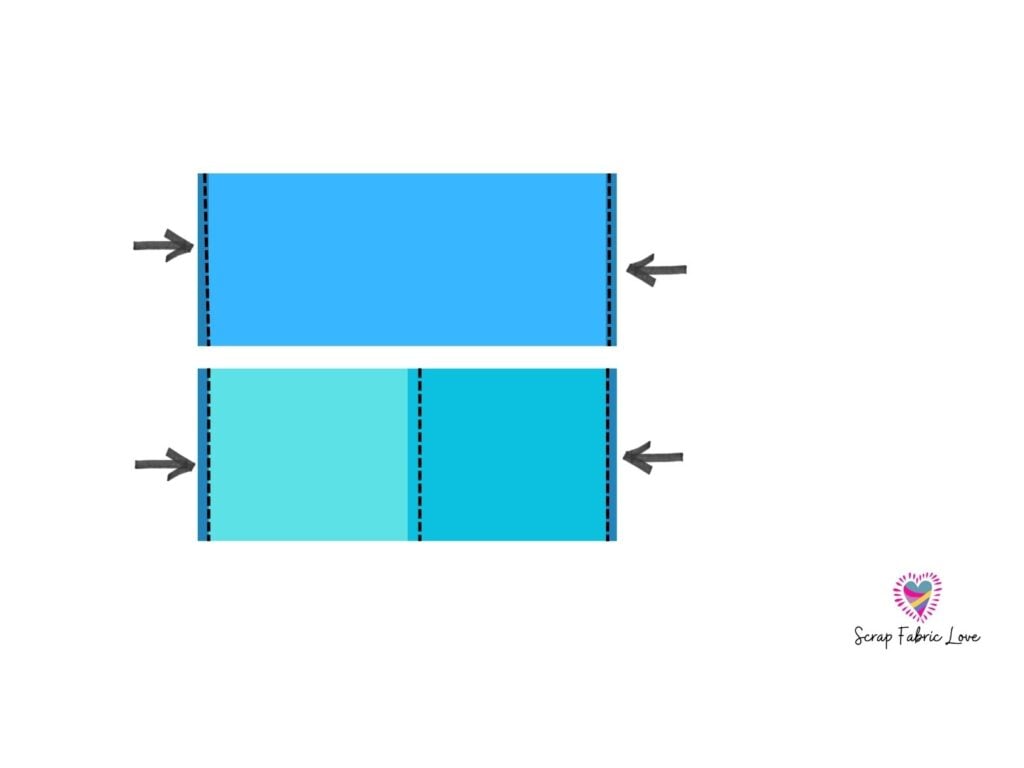
Step 1: Prepare Your Fabric Stack your fabric pieces wrong side up. If you’re using two separate pieces (front and back), sew them together first (right sides together) with a quarter-inch seam to create one long rectangle.
Step 2: Finish the Side Edges (Optional) This step prevents fraying where the drawstring exits and changes how your bow sits (on top vs. to the side).
- Quick method: Fold each short edge over about a finger-width and stitch
- Neat method: Fold twice to enclose the raw edge, then stitch
Timestamps in the video: 06:00 for quick method, 07:05 for neat method
Step 3: Add the Drawstring and Casing (The Magic Step!) This is where the method gets brilliant – no feeding ribbons through later!
- Cut your ribbon: one hand-width + fabric width + one hand-width
- Place ribbon along the top edge of your fabric (wrong side up)
- Fold the top edge over the ribbon
- Make a couple of stitches at the beginning of your casing and back stitch
- Pin once beside the presser foot through your casing and ribbon – keep ribbon from sliding
- Sew a quarter-inch from the raw edge, keeping the ribbon against the fold
Timestamps in the video: 10:22 for quick method, 14:20 for neat method
The ribbon stays loose inside the casing and can slide freely – that’s your drawstring mechanism right there!
Step 4: Sew the Bag
- Fold your fabric right sides together with the ribbons on the right
- Start stitching where the casing stitch line meets the side edge
- Sew down the side, stopping about two fingers from the bottom
- Optional but recommended: fold the bottom up once or twice for extra strength
- Stitch across the bottom
Timestamps in the video: 16:37 for quick method, 19:09 for neat method
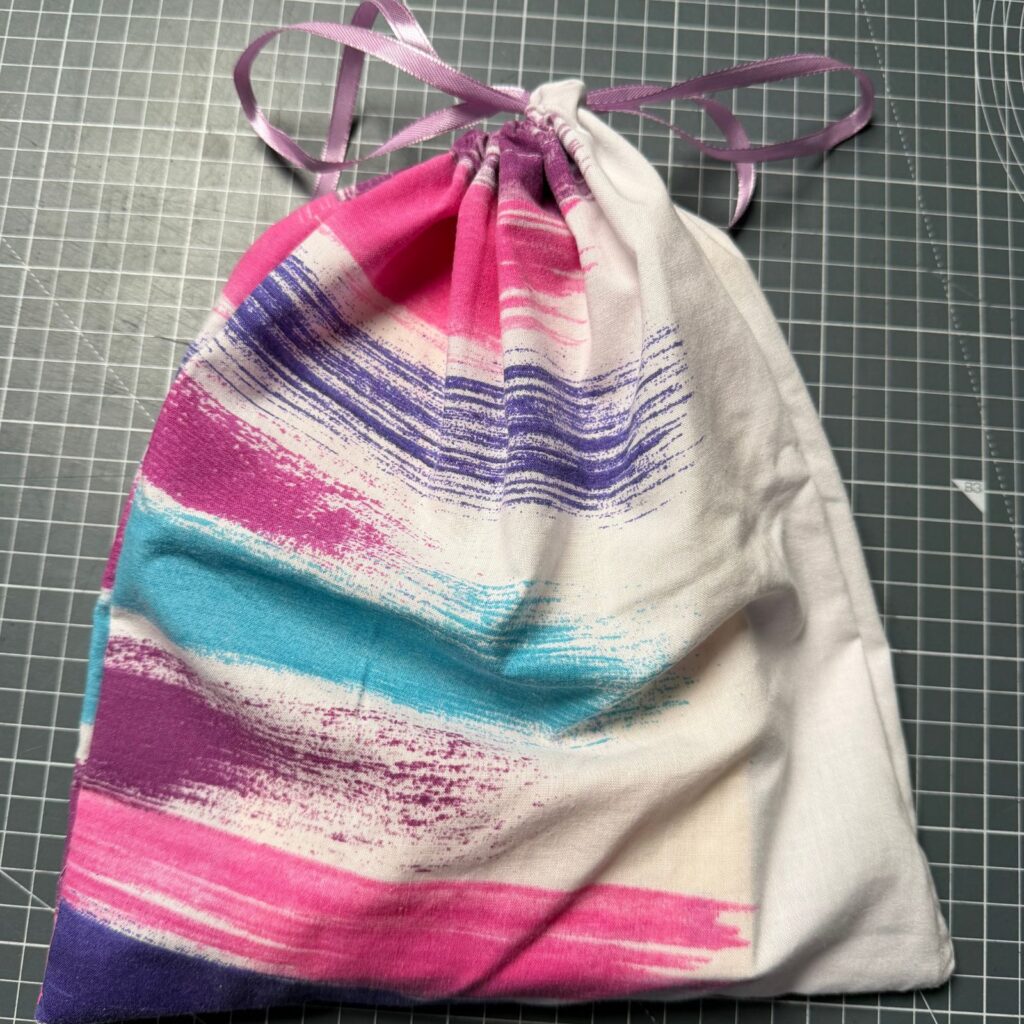
Step 5: Turn and Finish Push out the corners, turn right side out, and you’re done! Pull the drawstring to cinch, tie a bow, and you have a gorgeous reusable gift bag.
Batch Sewing Tips
If you’re making multiple bags like I did (64!), here’s how to make it even easier:
- Do one step at a time across all bags – finish all the side edges, then all the casings, then all the side seams
- Use one thread color that works with all your fabrics – I used white thread for mine!
- Check your bobbin regularly when chain piecing (especially if you don’t have a bobbin sensor to tell you when you are running low!)
- Stack bags with tops all facing the same direction so you don’t get confused
- Work in snippets – this method is perfect for sewing in short bursts in between other tasks
I worked on these off and on over two days while doing other things, and it was so satisfying to build up my stash without feeling like it was a huge time commitment.
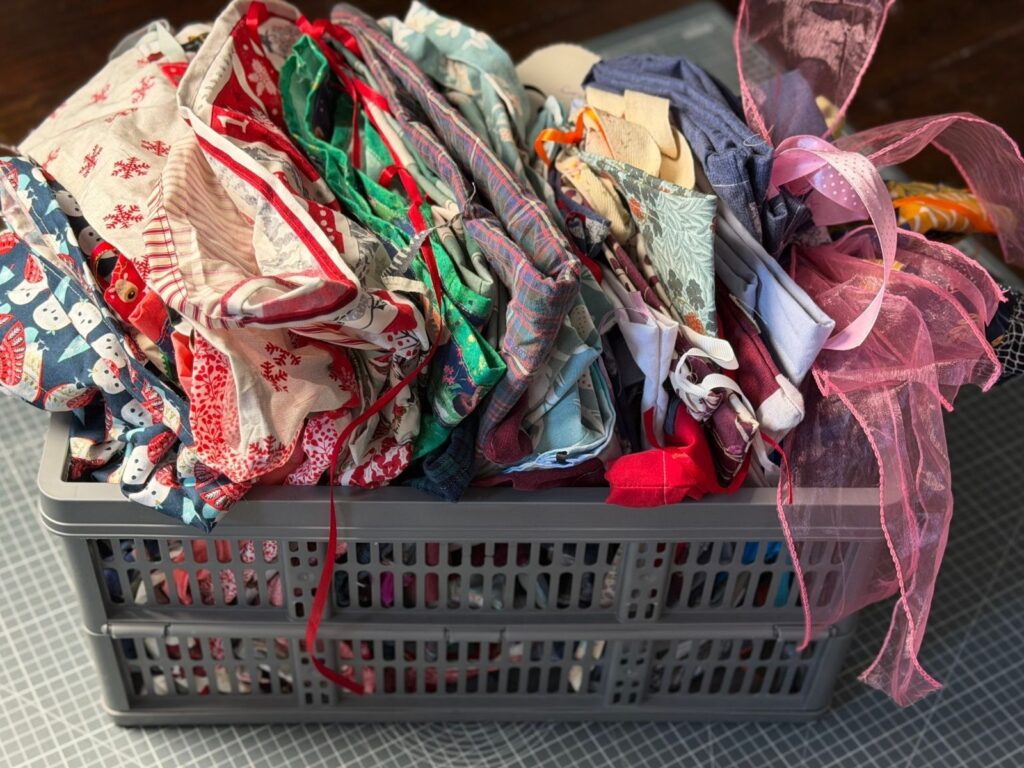
My Results
I made 64 drawstring gift bags in total, and I’ve already used one for a friend’s birthday! Most of my fabrics aren’t Christmas-specific so I can use these year-round, but if you use holiday prints, these are perfect for saving money on wrapping paper year after year.
Now Christmas Eve is going to be a breeze – I’ll definitely have a bag that fits every present, and I can feel good about reusing them instead of throwing away paper.

Watch the Full Tutorial
The video shows you both methods in detail, including how to handle different fabric types, what to do if you catch the ribbon while sewing (spoiler: it’s not a big deal!), and close-ups of every step.
See the full Video Tutorial above!
Join My Scrap Club!
If you love scrap-busting projects like this and want to be part of a no-judgment, beginner-friendly quilting community, I’d love to see you in my Scrap Club on Patreon!
We meet on Zoom, work on collaborative projects including group quilts and mini quilt swaps, and it’s just a lovely bunch of creative folk who love to experiment and play with fabric.
GET ALL THE DETAILS ABOUT JOINING SCRAP CLUB HERE
More Gift Bag Tutorials
Looking for a slightly fancier no-measure gift bag? I have another tutorial on the channel that’s one of my subscribers’ favorites! It’s great if you’re making just one or two bags for specific gifts and want to estimate the size you need.
Fancier Drawstring Gift Bag Tutorial – Still No Measuring, with lined and unlined versions.
Have you made reusable fabric gift bags before? What do you use for drawstrings? Drop a comment below – I’d love to hear what creative materials you’ve used!
And if you found this tutorial helpful, please consider subscribing to my YouTube channel and sharing this post with a friend who might love it too. It really helps me keep creating free tutorials like this one!
Happy sewing! 🎁
Kristen