Mini Flying Geese Free Foundation Paper Piecing Pattern & Tutorial

Foundation paper piecing is so much fun, just like this mini flying geese pattern.
This method of piecing fabric together is actually a super easy way of sewing precisely and a great way to use up fabric scraps too!
In this tutorial, you’ll learn all about what foundation paper piecing is and how to use this method, and then I’ll take you step-by-step through the pattern.
Table of Contents
- What is Foundation Paper Piecing?
- Supplies For Mini Flying Geese
- Free Foundation Paper Piecing Pattern – Mini Flying Geese
- Fabric Requirements
- Tips for Foundation Paper Piecing
- Joining Blocks
- Video Tutorial – Mini Flying Geese FPP
- Sizing your Flying Geese Pattern Up or Down
- How I Use Foundation Paper Piecing
What is Foundation Paper Piecing?
Foundation Paper Piecing (not the same thing as English Paper Piecing!) is when you sew your fabric directly onto a ‘foundation’ that has a guide printed on it showing you where to sew.
A foundation can also be another fabric if a pattern is printed on it, but traditionally, foundation paper piecing involves – you guessed it – paper.
This can be freezer paper, purpose-made foundation paper, or even just regular printer paper (which is what I used in the video below).

Foundation Paper Piecing (FPP) involves sewing patches onto the foundation in a specific order so that you are always sewing along a straight line.
When the patches are all together, they can make anything from an animal to a star to mini flying geese!
The possibilities are endless as long as the block can be divided into straight lines for sewing along.
So FPP Patterns can be super simple – like the flying geese below – or super complex involving multiple sections and loads of little pieces.
When I first learned about it while making my learner’s sampler quilt I thought it was intimidating and difficult – news flash – it isn’t!
Supplies For Mini Flying Geese
This post contains affiliate links – please see my disclosure policy for more details.
- Download and print the PDF pattern below at 100% scale to make a set of 4 flying geese with a 1.5″ x 3″ finished block size.
- Triangle-shaped fabric scraps (mine were offcuts from a quilt pattern I was working on, and they measured 1.75″ on the two short sides and 2.5″ on the longest side.
- Either regular printer paper, FPP Paper, or Vellum Tracing Paper
- Glue Stick (optional)
- Rotary cutter and straight-edge ruler
- Sewing machine & thread
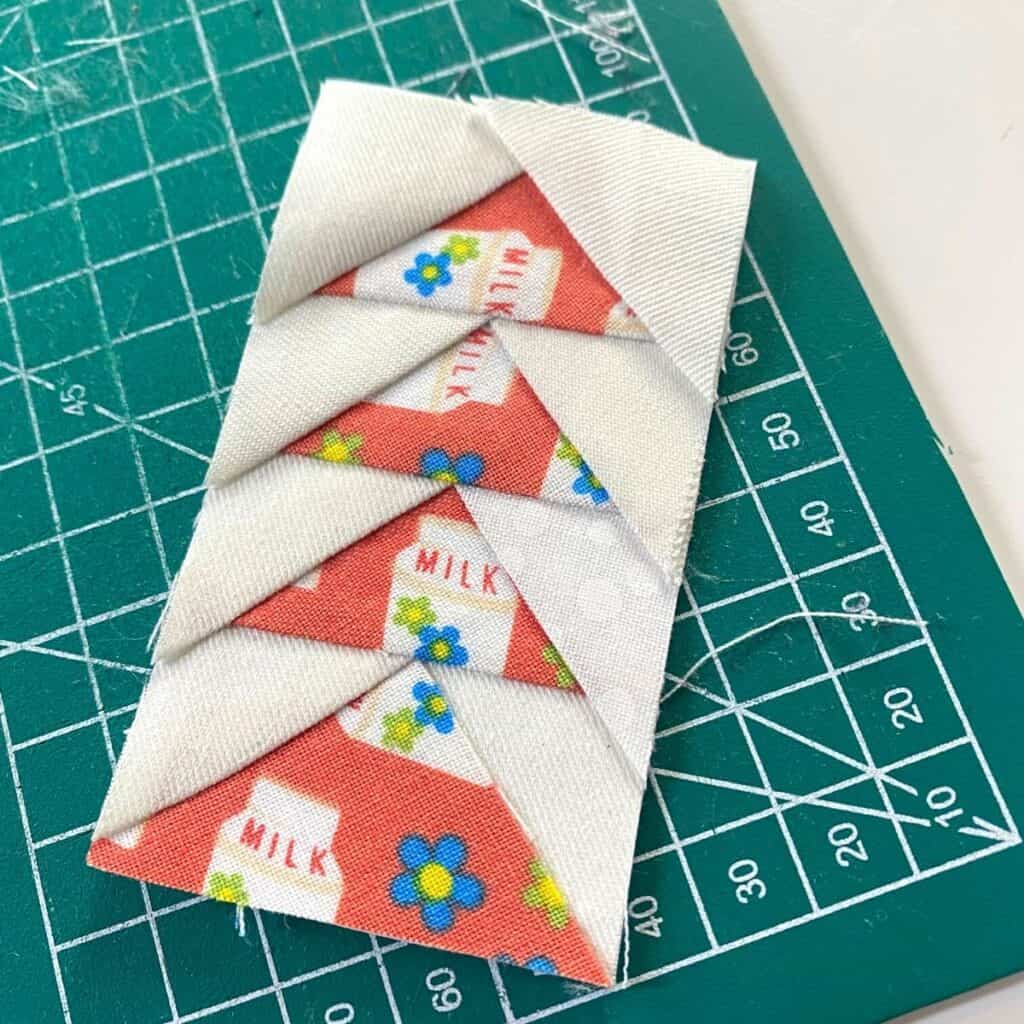
Free Foundation Paper Piecing Pattern – Mini Flying Geese
Below, you can download a free foundation paper piecing template for 1.5″ x 3″ four-in-a-block flying geese. There is also a free video tutorial below.
Fabric Requirements

You need four triangle patches for the central flying geese in this pattern, and eight background patches.
I choose to use patterned fabric for the central geese and various white patches for the background.
I made this FPP pattern this particular size to use up a huge heap of triangle-shaped offcuts from the current quilt pattern I am working on.
Those offcuts were all roughly 1.75″ on the two shortest sides by 2.5″ on the longest sides.
Tips for Foundation Paper Piecing

- Have a light source nearby so you can hold your pattern up to the light to check that your patch is large enough.
- Lower your stitch length to 1.5 so that the needle perforates the paper and makes it easier to remove later on.
- Trim your excess seams after sewing on each patch (see video below).
- Flip & check often to make sure your patches are in the right place before you sew.
Joining Blocks
If you get your 1/4″ seam correct around the edges of your block, you should have no problem joining these mini blocks to make a bigger block. You could even use them to make a quilt border or, if you make enough of them, a whole quilt!
When joining blocks, I remove the paper from the 1/4″ seam area after sewing right sides together and before pressing the seams open (see video above for more on this).
Be sure to flip and check that your points are joining up before you sew!

See the image above and spot the one in the block that wasn’t lined up correctly and lost his point!
Video Tutorial – Mini Flying Geese FPP
Follow the instructional video here to see how to use it and learn how you can size this pattern up or down to fit with fabric scraps you are trying to use up or just to make some flying geese in the size you want!
Sizing your Flying Geese Pattern Up or Down
The free pattern you can download above is for a 1.5″ x 3″ mini block and it includes a 1/4″ seam allowance.
If you are happy with that size, just print at 100% scale on your computer.
If you want to make it twice as big, print at 200%, or if you want it slightly smaller, print at 75% or 80% for example.
What you need to remember is that if you scale this up or down the 1/4″ seam allowance will not stay at a constant 1/4″.
So if you are scaling this pattern be sure to measure your 1/4″ seam for joining from the inner border on the pattern.

How I Use Foundation Paper Piecing

I use foundation paper piecing in a few ways:
- I make full quilts with FPP blocks
- I keep a stash of mini FPP patterns beside my sewing table to use up scraps and then use those mini blocks in quilts, pouches, and keychains.
- I make standalone projects like a room sign for my nephew where each letter is a different FPP block.
- I make single quilt blocks as part of larger sampler quilts or as an easier way of making traditional quilt blocks.
- I have made single FPP Blocks and then pieced fabric remnants around it to make a quilt.
Here are some other posts you might like:
- Foundation Paper Piecing Patterns FREE – Scrap Burst Quilt Block
- Framed Scraps Quilt Block – for Precious Fabric Scraps!
- Free Heart Pattern – Beginner Friendly Foundation Paper Piecing
- Quilt-as-You-Go Learner’s Quilt: Part 1
- Learning to Quilt: ‘Learner’s Quilt’ Sampler Part 2
- 7 Quilt as You Go Methods (No Hand-sewing!)


