Scrap Burst Quilt Block – FREE Foundation Paper Piecing Pattern
This is a fun and easy foundation paper piecing pattern. It is part of my Scrap Blocks Quilt Along series I am doing over on YouTube (see links below for how to sign up to the quilt along and for links to all the other blocks!)
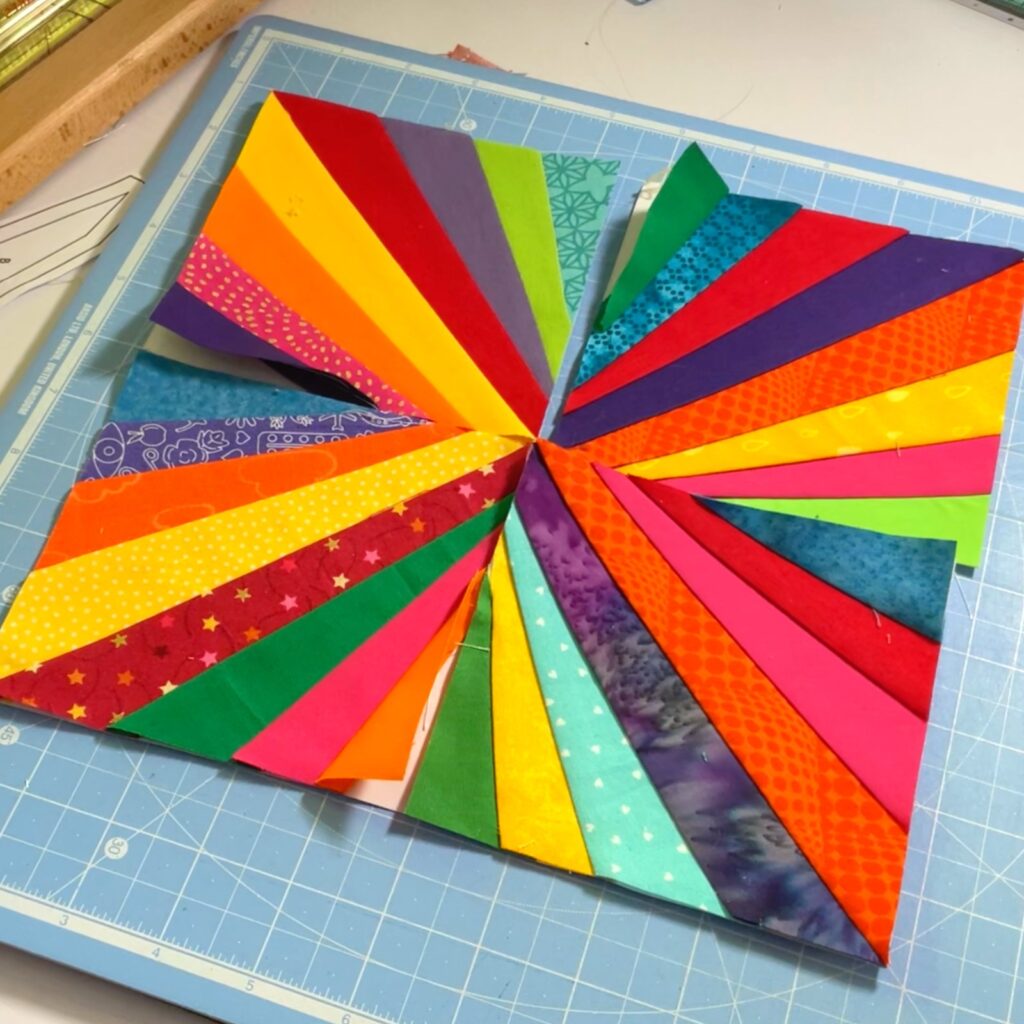
The Scrap Burst Quilt Block is essentially a strip block with slightly angled pieces. It makes your scraggly scrap strips into a beautiful burst of scrappy loveliness.
I hope you enjoy it!
Table of Contents
Fabric Requirements
This post contains affiliate links – please see my disclosure policy for more details.
- For 2 color block – (16) 2″ x 7″ strips (accent color); (16) 2″ x 7″ strips (background color or second accent color)
- OR just use the templates provided to find scraps big enough to use without pre-cutting (see video).
How to Piece the Scap Burst Quilt Block
Before starting on this block you need to sign up to the Scrap Blocks Quilt Along to get the free FPP template sent to you by email (you will also get the emails for the other blocks in the series).
Video Tutorial
Step 1: Print your Pattern & Template Pieces
First print 4 pattern pieces for each block you wish to make. Each pattern piece is one quadrant of a finished block.
See link above for how to get the pattern pieces and templates by signing up to the Scrap Blocks Quilt Along for free.

Print your pattern pieces and template sheet at 100% scale on your printer.
You can check if you have printed correctly by measuring your pattern piece to see if it measures 5″ x 5″ from outer seam line to outer seam line (see video if you are unsure).
Using scissors cut out your pattern and template pieces around the outer dark line to keep your seam allowances intact.
Step 2: Prepare your fabric Scraps
Each quarter block needs 8 strips of fabric.
Above under fabric requirements, you will see an easy standard strip size to use if you like to cut everything uniform ahead of sewing – 2″ x 7″ strips.
However, the beauty of FPP is that you don’t need to perfectly cut your patches ahead of time to make it work.
You can use larger pieces of fabric and trim them down as shown in the video tutorial or you can use the template pieces provided as a guide to use up oddly shaped strips and scraps that might be perfect for a patch in this block.

Use whichever method you prefer to gather your fabric scraps for each quarter block.
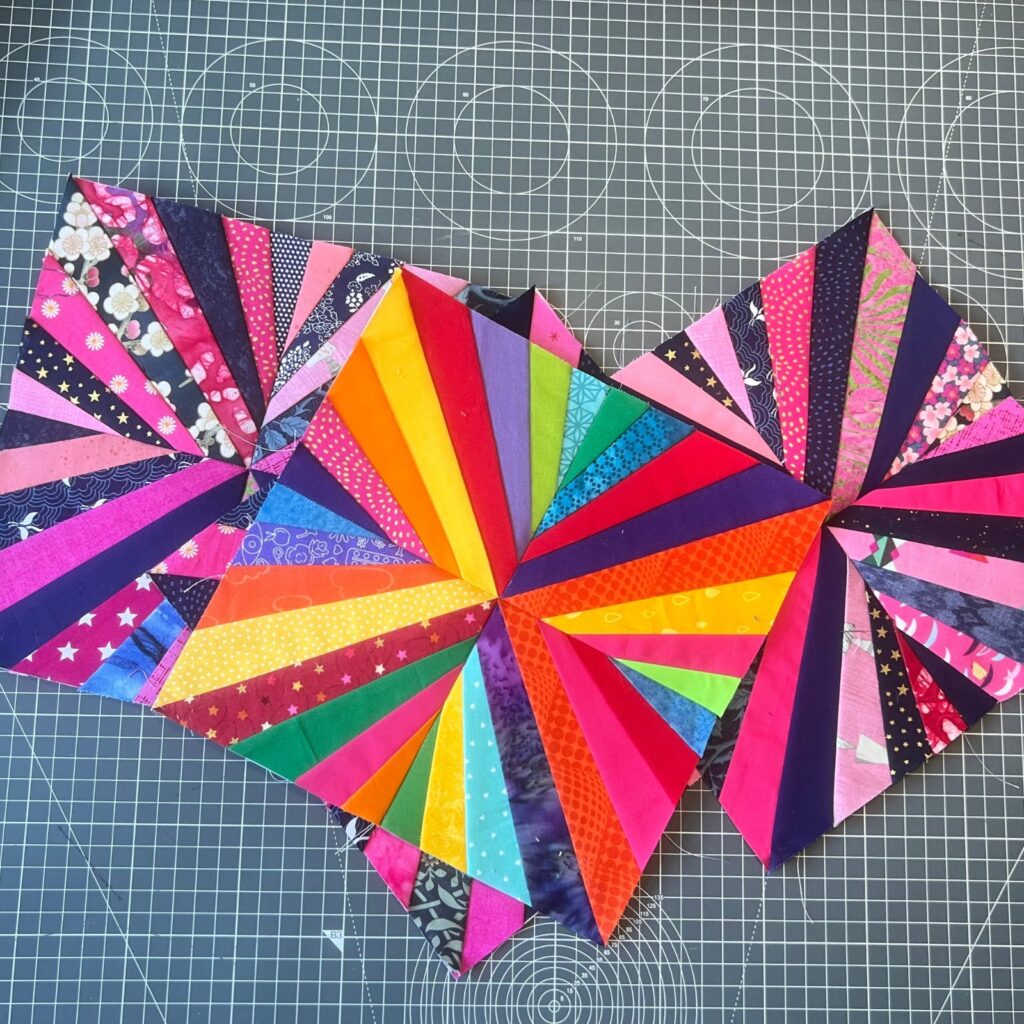
I did two versions of this block for myself. One with two colors (pink and navy) and one with a mix of rainbow colors.
Step 3: Begin Sewing
I use a glue stick for the first patch of any FPP pattern just to hold it in place.

The numbers on your pattern piece indicate the order the patches should be sewn in.
The letters (in brackets on your pattern) are the templates that correspond with each patch.
The fabric should be placed on the back of the printed pattern piece and you will sew on the printed side.
Make sure the patch of fabric you are using overlaps your stitch lines by at least 1/4 inch.

Add patch 2 right sides together and then sew on the line between patch 1 & 2 using a 1.5″ stitch length.
The shorter stitch length perforates the paper so that it is easier to tear off later.
Once sewn open up patch 2 and either press with an iron (this is what I do) or finger press before moving on.
Step 4: Trimming between patches
Next you will fold the pattern piece on the line between patch 2 and patch 3.
Then use a ruler with a 1/4 inch marking to trim off any access fabric from patch 2 but leaving a 1/4 inch seam allowance beyond the fold of the pattern piece (see video for clarity if needed).

You will trim in the same way after each patch you sew.
Step 5: Repeat

Repeat steps 3 and 4 for each patch of your quarter block. I give you a visual demonstration of a full quarter block in the tutorial video above.
Step 6: Trimming & Joining Quarter Blocks
When you have sewn on all the patches in one quarter block you will trim off the excess fabric around the outer seam line.


Then follow the joining instructions in your pattern to join quadrants 1 & 2; and 3& 4 before joining the two halves of the block.
The narrow ends of your strips for each quarter block should be in the center. Just rotate your quarter blocks until you are happy with your layout.
Join top two blocks and bottom blocks right side together, stitching on the inner line.


Finally join your two quilt block halves together making sure to match up your middle seam.
Again see the video for reference if you are not sure.
Finished Scrap Bursts Quilt Block

Printable Cheat Sheet – Top Tips to Remember

Scrap Bursts Quilt Block - Top Tips
Below are some useful reminders to print alongside the foundation paper piecing pattern needed to make this quilt block.
Materials
- For each quarter block (you need 4 quarters for a block), prepare 8 strips of fabric. These can be 2" x 7" or you can use smaller scraps by using the printable templates included with the free pattern.
- Four printed FPP pattern pieces per block (see sign up in blog post for how to get the pattern).
- Printed patch templates if you choose to use them.
Tools
- Sewing Machine
- Rotary Cutter and Cutting Mat
- Iron
Instructions
- Make sure to print both your pattern pieces and templates at 100% scale.
- You can check if you have printed correctly by measuring the pattern piece - it should be 5" x 5".
- You need 4 pattern pieces to make one 9.5" quilt block.
- Remember to test the size and position of your patches by flipping before sewing.
- Press and trim as you go, remembering to leave yourself a 1/4 inch seam for each subsequent patch.
- Remember the numbers on the pattern piece are the order you should sew your patches in and the letters in brackets are the corresponding template sizes for pre-cutting your scraps if you choose to.
- Pressing seams open when joining the top and bottom half of your blocks will help the center seam to line up correctly.
- DO NOT trim on the inner line of the pattern piece. You want to keep your 1/4 seam for joining your block to other blocks.
Frequently Asked Questions
There is no hard and fast rule here but I prefer a stitch length of 1.5.
It is a short enough stitch to perforate the paper enough so that it is easy to tear away and not so small that it is impossible to pick out should you need to get your seam ripper out!
This block is made using an FPP pattern. FPP stands for Foundation Paper Piecing which means your pattern is printed on paper that is used to help you piece your block.
EPP is very different. EPP stands for English Paper Piecing and involves small paper templates that help to hold small patches of fabric in place while the sewer hand stitches them together.
There are actually lots of options for types of paper from standard printer paper to specialist papers and freezer paper. Which is the ‘best’ is down to personal preference.
I prefer a thinner-weight standard printer paper myself.
Find the other Scrap Blocks Sew Along Videos
- Week 1 Scrap Blocks Sew Along Video (Intro and Hexagon Block): https://youtu.be/LJbzsSST6-4
- Week 2 Scrap Blocks Sew Along Video (Rectangles & Squares Block): https://youtu.be/yaZA_RAh30E
- Week 3 Scrap Burst Quilt Block: https://youtu.be/yZo_8aVnEjs
- Week 4 My Scrappy Heart Quilt & Quilt Block Pattern: https://youtu.be/MMz0Idncca8
- Week 5 Framed Frames Quilt Block: https://youtu.be/VkTDl0gXRSg
- Week 6 Big Star Block: https://youtu.be/6ngThDoFD6g
- Week 7 Big Scraps Block: https://youtu.be/qsaBh9XO5-I
- Week 8 Quilt Top Construction: https://youtu.be/Zku7OeJl-yc
More posts you might enjoy:
- 19+ Free Quilt Block Patterns for Scraps
- Big Scraps Quilt Block (Beginner Friendly Big Quilt Block)
- Easy Big Star Quilt Block – 20.5″ Block!
- Best Foundation Paper Piecing Paper – Testing 7 Kinds!
- Free Heart Pattern – Beginner Friendly Foundation Paper Piecing
- Mini Flying Geese Free Foundation Paper Piecing Pattern & Tutorial
- Easy Quilt Block Pattern for 2.5″ Strips
- Hexagon Log Cabin Quilt Block – Easy Tutorial
- Farmer’s Wife Quilt 1930s Sampler Quilt – Modern Scrappy Version
- One Color Crumb Quilt Block Tutorial
- Improv Braided Quilt Block – Use your Scraps!
- Fun Denim Quilt Blocks (Use your binding scraps for these QAYG Blocks!)


