How to Make a Quilted Wall Hanging from Scraps (Quilt-As-You-Go)


Do you have a box of fabric strips that you’ve kept but haven’t figured out what to do with yet?
It’s every crafter’s “problem.” Luckily, there are so many ways to use those fabric strips so they don’t end up in the landfill and can also make some great ideas for DIY gifts.

I love showing others how to create items using these scrap fabric pieces or “crumbs” in varying ways.
A quilted wall hanging is an easy way and just one clever use of fabric scraps.
This one is a super easy quilt-as-you-go style piece of wall art to help you highlight and make the most of your beautiful scraps!

Materials Needed to Make Quilted Wall Hangings
This post contains affiliate links – please see my disclosure policy for more details.
- Frame with a mount (mat)
- Fabric piece strips
- Piece of batting that is slightly larger than your mat
Quilted Wall Hanging Tutorial with Photos
Step 1: Prepare your batting and frame

You can use really any frame you have that has a mount (mat) included with it.
I used an old Ikea frame that has definitely seen better days and doesn’t have glass in it to create my piece of wall art. But, any old frame will work.
You may want to decide on the fabric colors you’re using first or where you’re going to put your wall decor. Think about whether a black, white, or wooden frame would look best for your space or your fabrics. Mine was plain white.

To prepare your batting, you’ll want to cut it until it’s just slightly larger than the opening of the mat – at least an 1″ all around.
Step 2: Choose your Fabric Pieces

Next, you’ll want to choose which fabric scraps you want to use. You may want to stick with a color theme or certain patterns.
I chose orange, pink, and purple scraps to keep it all color-coordinated the way I wanted it.
Place your batting on a flat surface and start laying out your fabric strips in the order you like them in. It may take a few tries (or a few trips back to your fabric stash for different fabric) to find exactly which order you like best.
Your strips can be whatever width you like. Mine were a mixture between 1″-2.5″ wide.
Remember you will have a 1\4″ seam so you will need more strips than you think to cover the space.
You also get to decide if you want to trim your strips to be completely straight or let them be a bit wonky if that is the state they are in. I let mine be wonky!
If you have any fabric strips that aren’t long enough that you still want to use you can join them to another piece or use small scraps to break up long strips if you like that effect.

I used small scraps to lengthen the orange row and one of the pink ones and I decided to trim down a purple strip to add some smaller scraps to it just because I liked how that looked.
Step 3: Sewing Guide for your Quilted Wall Hanging
Note: There is also a video tutorial further down in this post if you prefer.
Once you have your fabric scraps laid out exactly how you want them on the batting, take a picture of your layout so you can remember what order you want to sew things in.
Move your strips over to your sewing machine and start by lengthening any strips that need a little bit of extra fabric. You can also take this time to sew on any tiny pieces of fabric either as part of lengthening your strips or as accents like I did.
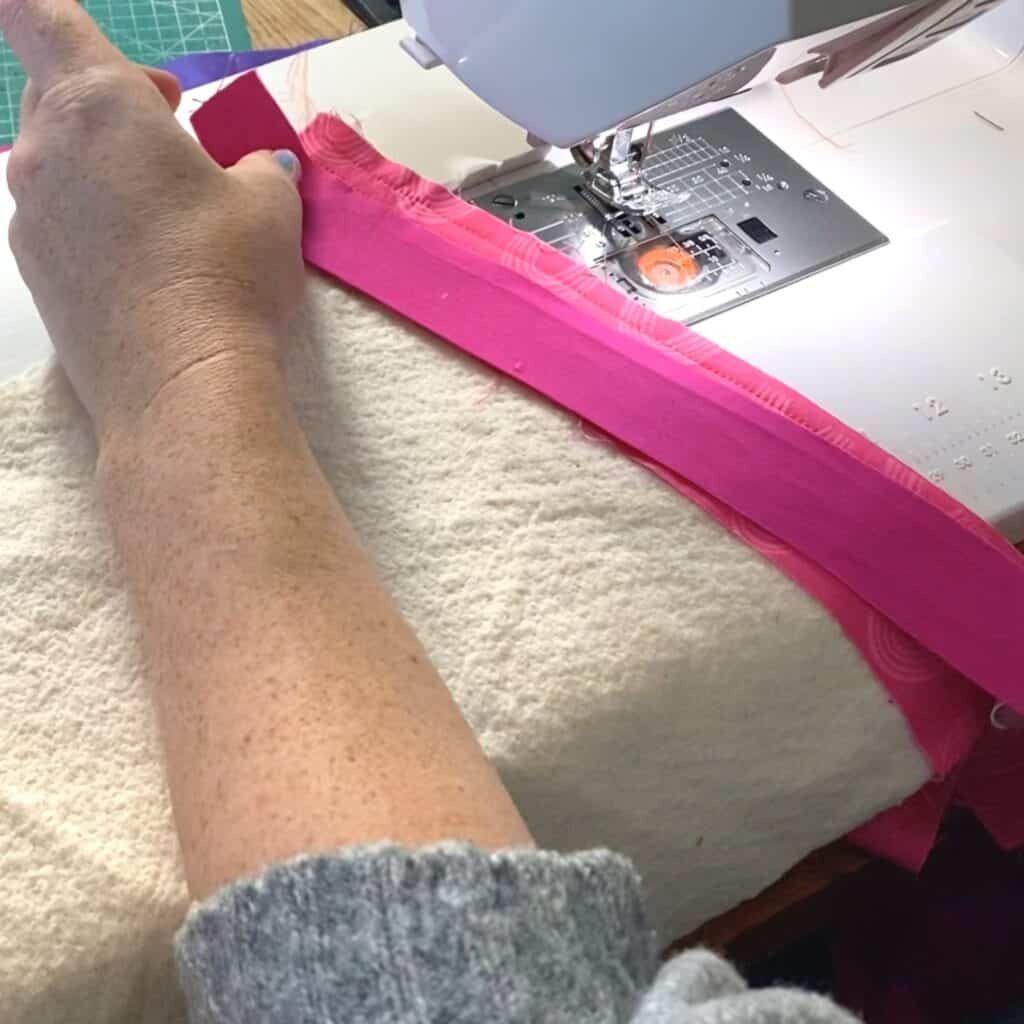
Sewing Down the First Strip

Once your strips are all at least the length you need, take your batting to the sewing machine and place your first strip down right side up on one end of your batting.
Sew down with a stitch length of 3. This is the start of the quilt as you go part of this wall hanging.
I chose a wider stitch length because it’s a top stitch and gives a nice quilted look.
You can use your presser foot or a seam guide to sew even straight lines or go wavy and freehand with it.
Quilt your strip down with 2 or 3 rows of stitching depending on the width of your strips – remember to leave space beside the inner raw edge to join your next strip.
Continue to Quilt-As-You-Go
Once the first piece is in place you can go ahead and sew the next piece on right sides to right sides lining up the raw edges. Use a 1/4″ seam allowance or as close as you can get for this.
If this was for other items such as pillows, you’d want to shorten your stitch length to join your strips but for this wall hanging, it doesn’t matter as much and it saves a step to not keep going back and forth with stitch length so I left my stitch length at 3 throughout.
Once the second strip is sewn on flip it so it is right-side up – finger press the seam down and quilt your second strip like you did the first one.

You can do whatever kind of stitching you like:
- Straight line
- Wavy
- Other decorative stitches
Keep adding each strip, sewing right sides to right sides until you reach the end of the batting.
You’ve now completed the bulk of your quilted wall hanging.
Step 4: Trim your Wall Hanging

Once you finish your sewing, it’s time to trim off the excess fabric!
Place your wall hanging right side down and trim off the excess scraps off the sides of the batting.
- 7 Quilt as You Go Methods (No Hand-sewing!)
- Scrappy Improv Quilt Squares
- How to Make Fabric from your Scraps – Part 1: Irregular Shaped Scraps
Step 5: Place your Quilted Wall Hanging in a Frame

Take your trimmed panel right side down and place it on the back of your mat.
Flip it over and make sure it is sitting on the mat exactly how you like it.
Once you’re happy, flip it back over and adhere the piece to the mat with tape.
Place in the frame, replace your frame backing, and it’s ready to hang on your wall!
Video Tutorial: Quilted Wall Hanging
Final Result: Quilt-as-You-Go Quilted Wall Hanging

The whole fun project took me about 20-30 minutes and resulted in a pretty satisfying wall hanging that brightens up my dreary wall.

Not to mention, it reduced the size of my scrap bin…slightly.
This could make a great gift for someone that loves wall art and/or quilting.
Also, you could easily make this in a range of sizes.
As long as you have the pieces of fabric and the right size frame, you’ve got a wealth of options.

Happy quilting!
More Posts you might like:


